MODEL REFERENCE
Brother HL-L2395DW
49 errors · 46 troubleshooting topics · 6 guides
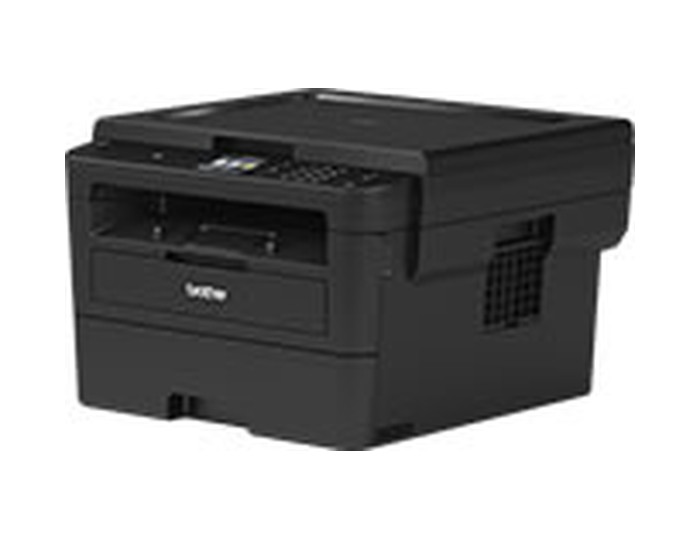
The checks and guides below come from the official manuals for this model.
No matches for this wording. Try a light name, error code or a shorter phrase.
Errors and messages
Machine display and printed WLAN report 2-sided Disableback cover or duplex tray open
Close the rear cover fully and seat the two-sided tray firmly.
Cartridge Errortoner cartridge not seated
Remove the drum and toner assembly, take out the cartridge and seat it in the drum again. Reinstall the assembly. Contact Brother if the warning remains.
Cover is Opena cover is open
Open and firmly close the front cover, or close the fuser cover inside the rear cover. The ADF-cover branch applies to other models.
Drum !drum wire or assembly needs attention
Clean the corona wire. If the message remains, reseat the toner cartridge in the drum and reinstall the assembly.
Drum End Soondrum nearing end of life
Arrange a replacement drum so it is ready when Replace Drum appears.
Jam 2-sidedpaper jam in two-sided path
Remove the paper and two-sided trays, clear the jam from the rear path, then reinstall both trays and close the cover.
Jam Insidepaper jam inside printer
Open the front cover, remove the drum and toner assembly, clear the jam, and close the cover.
Jam Rearpaper jam at rear fuser
Open the rear fuser cover, remove the jammed paper and close it fully. Press Retry if the warning remains.
Jam Traypaper jam in paper tray
Pull out the indicated tray, remove jammed paper, and push the tray back in firmly.
Manual Feedmanual feed slot is empty
Put a sheet in the manual feed slot, or change the paper source in the printer driver.
No Paperpaper tray empty or loaded incorrectly
Refill or reload the paper tray, set the guides to the paper size, and keep the stack below the fill limit.
No Tonertoner cartridge not detected
Reseat the toner cartridge in the drum assembly and reinstall it. Replace the cartridge if the message persists.
Out of Memoryprinter or fax memory full
- During copying, press the red X stop control or Quit, wait for other operations to finish and try again.
- During printing, reduce resolution.
- Fax-memory instructions do not apply to this model.
Print Unable XXmechanical print fault
Hold Power to switch off, wait a few minutes and switch on again. Contact Brother if the fault remains.
Replace Drumdrum replacement or counter reset needed
Replace the drum with the compatible unit. If a new drum was installed without resetting its counter, perform the documented counter reset, with the front cover closed.
Replace Tonertoner cartridge exhausted
Install a new toner cartridge to resume printing.
Scan Unable XXmechanical scan fault
Hold Power to switch off and then switch on again. Contact Brother if the fault remains.
Self-Diagnosticfuser temperature fault
Hold Power to switch off, wait a few seconds and switch on again. Leave the machine powered and idle for fifteen minutes.
Size Error 2-sidedpaper size unavailable for two-sided printing
Use Letter, Legal, or Folio paper and match the driver, machine, and tray size settings.
Size mismatchloaded paper size differs from tray setting
Load the configured paper size and set the tray to match.
Toner Endedtoner cartridge exhausted
Install a new toner cartridge to resume printing.
Toner Lowtoner cartridge nearly empty
Order a replacement toner cartridge now; printing can continue until Replace Toner appears.
Cooling Downprinter cooling down
Wait for cooling and clear obstructions from the vents. Printing resumes when cool. If the fan is not spinning, disconnect power for several minutes and reconnect.
A device is already connected. Press [OK].wi-Fi Direct client limit reached
Disconnect an existing mobile-device connection, then configure Wi-Fi Direct again. Print the Network Configuration Report to check connection status.
Connection Errorcompeting Wi-Fi Direct requests
Stop other devices trying to connect at the same time, then configure Wi-Fi Direct again.
Connection Failedwi-Fi Direct devices cannot communicate
Move the mobile device closer and remove obstructions. If using WPS PIN, enter the correct PIN.
No Devicewi-Fi Direct device not found
Enable Wi-Fi Direct on both devices, move them closer and remove obstructions. For manual setup, check the password and ensure the mobile device obtains its IP address using DHCP.
TS-01wireless networking is disabled
Enable the printer’s wireless setting and repeat setup.
TS-02wireless router is not detected
Restart the router after disconnecting power for ten seconds. Allow the printer’s MAC address through filtering, check SSID and security details and select a 2.4 GHz network.
TS-04wireless security mode is unsupported
Use an authentication and encryption combination supported by this guide, such as WPA2-Personal with AES. Confirm SSID and security details if setup still fails.
TS-05network name or key is wrong
Confirm the SSID and Network Key and enter them again.
TS-06wireless authentication or encryption details are wrong
Confirm authentication method, encryption method and Network Key, then retry.
TS-07wPS-enabled router is not detected
Start WPS on both printer and router using the router’s documented method, then retry.
TS-08multiple WPS routers are detected
Activate WPS on only the intended router within range, or wait a few minutes and retry.
Access Deniedrequested function is restricted
Ask the administrator to check the Secure Function Lock permissions.
Limit Exceededsecure Function Lock print limit reached
Ask the administrator to check the allowed printing limit.
Print Data Fullsecure print storage is full
Press the red X stop control and delete stored secure print data that is no longer needed.
Touchscreen Initialisation Failedtouchscreen startup failed
Remove anything touching or resting on the touchscreen. If debris is trapped below it, slide a piece of stiff paper between the lower screen edge and frame to dislodge it.
Wrong Date & Time, contact your administrator.network time settings are wrong
Check SNTP server access settings and the machine’s Date&Time in Web Based Management.
Connection Error 02web Connect network connection failed
Check the network connection. If Web was selected immediately after power-on, wait for the network to connect and try again.
Connection Error 03web Connect server connection failed
Confirm network and server settings, wait and retry. After power-on, allow the network connection to become ready first.
Connection Error 07web Connect date or time is incorrect
Set the date and time correctly; unplugging power can restore them to factory values.
Authentication Error 01web Connect account PIN is incorrect
Enter the four-digit PIN chosen when the account was registered on the machine.
Authentication Error 02web Connect temporary ID is invalid or expired
Enter the correct unused temporary ID. If its 24-hour validity has expired, obtain a new ID through Brother Web Connect and register the account again.
Authentication Error 03web Connect display name is already registered
Choose a different account display name.
Server Error 01web Connect authentication has expired
Request a new Brother Web Connect temporary ID and use it to register the account again.
Server Error 03web Connect upload file is unsupported or damaged
Check the service’s size and format limits. Save in another supported type or obtain an undamaged copy before uploading again.
Server Error 13web service is temporarily unavailable
Wait and retry. If the warning returns, open the service from a computer to check whether it is unavailable.
Shortcut Error 02web Connect shortcut points to a deleted account
Delete the shortcut, then register the account and shortcut again.
Troubleshooting
Find the problem you are experiencingNo printout3 steps
- Turn on the printer, select the correct Brother driver and clear displayed errors.
- Check that its queue is online.
- In the Windows versions described by this guide, clear Use Printer Offline; on its Mac setup, remove and re-add an offline printer.
Printing stops partway through a jobView
Cancel the job, clear it from memory and send the data again. The interrupted printout can be incomplete.
Printer produces unexpected or garbled outputView
Cancel and resend the job, check the application’s print settings and select the Brother printer driver.
Later pages have missing textView
Check application settings and that the USB interface cable is securely connected so all print data is received.
Automatic two-sided printing does not workView
Select a supported two-sided size in the driver and use paper weighing 16–28 lb, or 60–105 g/m². Match the tray setting and actual size.
Printing is slowView
Lower print resolution to reduce processing time, and switch off Quiet Mode if faster printing is needed.
Paper does not feedView
Straighten or turn over the stack, reduce excess sheets, check the selected Paper Source and clean the pick-up rollers.
Manual-feed slot does not take paperView
Select Manual as Paper Source and insert one sheet firmly with both hands until its top edge reaches the rollers and the machine takes it.
Envelopes do not feedView
Feed one envelope at a time through the manual slot and select its size in the application’s page or document setup.
Faint printView
Check room conditions and switch off Toner Save if the whole page is pale. Clean the drum and corona wire. Replace exhausted or damaged toner or drum as indicated.
Gray print backgroundView
Check heat and humidity, clean the drum, then replace the toner or drum if the background remains.
Ghost images3 steps
- Check low temperature or humidity and select the correct media type.
- Raise the two green rear levers fully, clean the drum and replace worn toner or drum.
- Contact Brother if the fuser needs service.
Toner specksView
Match media type to the paper and clean the drum. Replace damaged toner or drum, and contact Brother if the fuser is contaminated.
Hollow printView
Try Thick Paper mode or thinner paper, match the machine’s media setting and check humidity. Replace the drum if damaged.
Entire page prints blackView
Clean the drum’s corona wire and replace a damaged drum.
White horizontal linesView
Choose the correct media type. Print several blank pages, especially after long disuse, then clean or replace the drum if needed.
Horizontal dark linesView
Clean the drum and replace it if damaged.
White bands or ribbingView
Check heat and humidity, clean the drum and replace it if several printed pages do not clear the bands.
Spots repeat every 94 mmView
Make ten to fifteen copies of a blank white sheet. If spots remain, use the Drum Dot Print cleaning procedure to remove deposits. Replace the drum if damaged.
Black toner marks across the pageView
Clean the drum, especially after using laser labels. Clips, staples or prolonged light exposure can damage it. Replace damaged toner or drum if cleaning does not help.
Black vertical lines or toner streaksView
Slide the corona-wire tab to clean the wire and return the tab to Home. Replace damaged toner or drum. Contact Brother if the fuser needs service.
White vertical linesView
Check for torn paper, sticky notes or dust inside and around the toner and drum. Replace damaged toner or drum.
Image is skewed3 steps
- Place copying originals correctly on the scanner glass.
- Load paper squarely, adjust guides, reduce excess paper and remove loose scraps.
- For duplex-only skew, check the two-sided tray and rear cover.
Paper curls or wavesView
Check paper quality, heat and humidity. Turn over and fan an old stack, or rotate it 180 degrees. Open the rear face-up output and try Reduce Paper Curl in the driver.
Paper wrinkles or creasesView
Load paper correctly, check its quality, then turn over or rotate the stack 180 degrees.
Toner does not fix to the paperView
Raise the two green rear levers fully, match media type and select Improve Toner Fixing. If needed, choose a thicker media setting; use Env. Thick for envelopes.
Envelopes creaseView
Lower the green rear levers to their envelope position, open the rear face-up output and feed through the manual slot. Raise the levers fully afterward.
Wireless setup cannot be completed3 steps
- Restart the router, confirm SSID and key, permit the printer’s MAC address and enter a hidden SSID manually if needed.
- For Wi-Fi Direct, check its password, move within about one metre, remove interference and restart setup.
- Print the WLAN Report for a precise TS code.
Printer cannot print or scan over Wi-Fi4 steps
- Allow Brother through security software; Windows network scans use UDP 54925.
- On Mac, reselect the scanner in iPrint&Scan or Device Selector.
- Check IP address and subnet, remove failed queued jobs and inspect the WLAN Report.
- Reinstall software if the listed checks fail.
Network devices do not appear connected4 steps
- Check power, removed packaging, toner, drum, covers and paper.
- For wired use, check the cable and blinking Link LED.
- Print the Network Configuration Report and verify Wireless Link Status is Link OK when using Wi-Fi.
- Ping the IP address or node name and correct IP addressing if it fails; check the WLAN Report for wireless faults.
Printer is missing from AirPrintView
Turn it on, confirm network settings and move the mobile device closer to the access point or printer.
AirPrint does not printView
Check printer power and network settings.
AirPrint prints only the first pageView
Update the iOS operating system used for printing.
Printer will not turn on2 steps
- Unplug for ten minutes, reconnect and press Power.
- If it still fails, turn it off, remove any backup battery or surge-suppressor device and try a known working wall outlet directly.
Security software blocks installation2 steps
- Allow the Brother setup program in Windows security software.
- For the documented Mac case, temporarily suspend the interfering firewall while installing and restore protection afterward.
Copies have vertical black linesView
Clean the scanner glass and white plastic above it using the scanner-cleaning procedure.
Copies are blankView
Place the original correctly on the scanner glass.
Windows TWAIN or WIA scan errorsView
Select the Brother TWAIN or WIA driver as the application’s primary source.
Mac TWAIN or ICA scan errorsView
Choose the Brother TWAIN source, or use the supported ICA scanner driver.
OCR does not workView
Increase scan resolution and retry.
Software cannot install or printView
Run the Windows installation program again to repair and reinstall the software.
Clear tray, rear, internal or duplex paper jams4 steps
- Use the procedure for the indicated path.
- Pull out the tray for tray jams, open the rear fuser cover for rear jams, remove the drum and toner assembly for internal jams, or remove both trays for two-sided jams.
- Wait ten minutes for cooling before handling hot internal parts.
- Remove all scraps and reinstall covers and trays firmly.
BR-Script3 will not print binary EPS dataView
In the Windows versions described by the guide, open the Brother BR-Script3 printer’s Printer properties, Device Settings, Output Protocol and choose TBCP, Tagged binary communication protocol.
Cannot make a copyView
Select Copy and confirm Copy mode. Ask the administrator to check Secure Function Lock permissions.
Cannot scan because access is restrictedView
Ask the administrator to check your Secure Function Lock permissions.
Guides
Routine maintenance
Instructions from the manualReplace toner and drum3 steps
- Use TN-730 or TN-760 toner and DR-730 drum for the region covered by this guide.
- Remove the assembly, release and replace the cartridge, clean and home the corona-wire tab and reinstall.
- For a new drum, replace it and reset its counter only after replacement.
Reset the drum counter3 steps
- With power on and the front cover closed, press the red X to clear the error, then hold the Toner icon for five seconds.
- Choose Drum Unit, confirm Yes and press Home.
- Reset this counter only after fitting a new drum.
Clean the printer and scanner4 steps
- Use a dry lint-free cloth for the printer’s exterior and interior.
- Do not use flammable sprays or alcohol/ammonia solvents.
- For scanner cleaning, switch off, unplug and use a soft lint-free cloth lightly moistened with water on the glass and white plastic.
- Let it dry before reconnecting.
Clean the corona wireView
Remove the drum and toner assembly and slide the green tab side to side several times. Return it to Home before reinstalling.
Clean the drum using Drum Dot Print4 steps
- Open Settings, All Settings, Print Reports, Drum Dot Print, then press Yes and Home.
- Switch off before removing the toner and drum assembly.
- Match spot positions with the numbered drum surface and wipe deposits with a dry cotton swab.
- Turn the drum by its gear without touching its surface, then refit the assembly.
Clean paper pick-up rollers2 steps
- Switch off, unplug and remove the paper tray.
- Wipe the tray’s separator pad and the two pick-up rollers with a lint-free cloth moistened with water, then refit the tray and reconnect.