MODEL REFERENCE
Brother Innov-is NS80PRW
10 errors · 27 troubleshooting topics
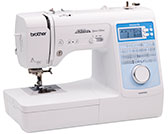
The checks and guides below come from the official manuals for this model.
No matches for this wording. Try a light name, error code or a shorter phrase.
Error codes
Shown on the machine display E1presser foot is raised
Lower the presser-foot lever before starting.
E2buttonhole lever is down for another stitch
Raise the buttonhole lever before sewing the selected non-buttonhole stitch.
E3buttonhole lever is up for a buttonhole
Lower the buttonhole lever before sewing the buttonhole.
E4bobbin winder remains in winding position
Move the bobbin-winder shaft left before sewing.
E5start/Stop was pressed with the controller connected
Disconnect the controller to use Start/Stop, or sew with the controller.
E6tangled thread locked the motor
Switch off and clean tangled thread from the race. Reinstall the bobbin case, replace a bent or broken needle, and rethread both upper and bobbin paths.
E7selected stitch cannot use twin-needle mode
Choose a stitch that supports the twin needle before switching needle mode.
E8twin-needle mode is active for an incompatible stitch
Switch to single-needle mode and replace the twin needle with a single needle before sewing.
E9needle-plate cover was removed while powered on
Switch the machine off and refit the needle-plate cover before continuing.
F*machine reports a malfunction
Contact a Brother authorized service center and report the F code; the star represents the displayed number.
Troubleshooting
Find the problem you are experiencingCannot thread the needle7 checks
- Needle is not in the correct position
- Raise the needle with the Needle position button.
- Needle is installed incorrectly
- Turn the machine off and install the needle correctly.
- Needle is turned, bent or the point is dull
- Replace the damaged or dull needle with a straight one.
- Upper threading is incorrect. The needle threader lever is not lowered until it clicks
- Rethread the upper thread and lower the needle-threader lever until it clicks.
- The needle threader hook is bent and does not pass through the eye of the needle
- Contact a Brother authorized service center about the bent threader hook.
- The needle threader lever cannot be moved or returned to its original position
- Contact a Brother authorized service center if the threader lever is stuck.
- A size 65/9 needle is being used
- Thread a size 65/9 needle by hand; it cannot use the needle threader.
Bobbin thread does not wind neatly on the bobbin3 checks
- The thread is not passed through the bobbin winding thread guide correctly
- Route the thread through the bobbin-winding guide correctly.
- The thread that was pulled out from the bobbin- winding thread guide was incorrectly wound onto the bobbin
- Route the thread correctly and wind it onto the bobbin as instructed.
- The empty bobbin was not set on the pin properly
- Seat the empty bobbin correctly on the winding pin.
While winding the bobbin, the bobbin thread was wound below the bobbin winder seat2 checks
- The thread was incorrectly passed under the pretension disk on the bobbin-winding thread guide
- Stop winding, cut the thread beside the guide, move the shaft left and remove the bobbin.
- Unwind the trapped thread clockwise from beneath the seat; leave the seat and guide-post screw installed.
- Follow the manual’s detailed procedure
- Stop winding, cut the thread beside the guide, slide the shaft left and remove the bobbin. Unwind trapped thread clockwise; do not remove the winder seat or guide-post screw.
The bobbin thread cannot be pulled up2 checks
- Needle is turned, bent or the point is dull
- Replace the damaged or dull needle with a straight one.
- Bobbin is set incorrectly
- Install the bobbin correctly and guide its thread through the bobbin-case slot.
Nothing appears in the LCD2 checks
- Main power switch is not turned on
- Switch on the main power.
- The plug of the power cord is not inserted into an electrical outlet
- Connect the power cord to the outlet.
The sewing lamp does not come on1 check
- The sewing light is damaged
- Contact a Brother authorized service center about the damaged sewing light.
The LCD screen is fogged up1 check
- Condensation has formed on the LCD screen
- Allow the LCD condensation to clear.
Machine does not operate5 checks
- “Start/Stop” button was not pressed
- Press Start/Stop to begin sewing.
- The bobbin winder shaft is pushed to the right
- Move the bobbin-winder shaft left to the sewing position.
- There is no stitch selected
- Choose a stitch before starting.
- Presser foot is not lowered
- Lower the presser foot before starting.
- “Start/Stop” button was pressed with the foot controller attached
- Disconnect the foot controller to use Start/Stop, or sew using the controller.
Needle breaks20 checks
- Needle is installed incorrectly
- Turn the machine off and install the needle correctly.
- Needle clamp screw is not tightened
- Turn the machine off and tighten the needle-clamp screw.
- Needle is turned or bent
- Replace the damaged or dull needle with a straight one.
- Using improper needle or thread for the selected fabric
- Match the needle and thread to the fabric using the manual’s combination chart.
- Wrong presser foot was used
- Fit the presser foot specified for the stitch.
- Upper thread tension is too tight
- Reduce the upper-thread tension.
- Fabric is pulled during sewing
- Guide the fabric without pulling it.
- Spool of thread is set incorrectly
- Fit the spool and the correct spool cap securely.
- There are scratches around the opening in the needle plate
- Contact a Brother authorized service center about scratches on the needle plate or foot. The notch on the left of the needle-plate opening is intentional.
- There are scratches around the opening in the presser foot
- Contact a Brother authorized service center about scratches on the presser foot.
- There are scratches on the bobbin case
- Contact a Brother authorized service center about the scratched bobbin case.
- A bobbin designed specifically for this machine is not used
- Use a bobbin designed for this model.
- Upper threading is incorrect
- Rethread the upper thread correctly.
- Bobbin is set incorrectly
- Install the bobbin correctly and guide its thread through the bobbin-case slot.
- Presser foot is attached incorrectly
- Refit the presser foot correctly.
- Screw of the presser foot holder is loose
- Turn the machine off and tighten the presser-foot holder screw.
- Fabric is too thick
- Use fabric within the recommended thickness and the correct needle.
- Fabric is fed forcefully when sewing thick fabric or thick seams
- Let the feed mechanism advance thick seams without forcing the fabric.
- Stitch length is too short
- Increase the stitch length.
- Bobbin thread is incorrectly wound
- Rewind the bobbin correctly.
Upper thread breaks12 checks
- Machine is not threaded correctly (used the wrong spool cap, spool cap is loose, the thread did not catch the needle bar threader, etc.)
- Rethread the machine, fit the correct spool cap securely, and route thread through the needle-bar guide.
- Knotted or tangled thread is being used
- Replace knotted or tangled thread with smooth thread.
- The selected needle is not appropriate for the thread being used
- Choose a needle matched to the thread.
- Upper thread tension is too tight
- Reduce the upper-thread tension.
- Thread is tangled
- Switch off, remove the trapped thread, and clean the race before rethreading.
- Needle is turned, bent or the point is dull
- Replace the damaged or dull needle with a straight one.
- Needle is installed incorrectly
- Turn the machine off and install the needle correctly.
- There are scratches around the opening of the needle plate
- Contact a Brother authorized service center about scratches on the needle plate or foot. The notch on the left of the needle-plate opening is intentional.
- There are scratches around the opening in the presser foot
- Contact a Brother authorized service center about scratches on the presser foot.
- There are scratches on the bobbin case
- Contact a Brother authorized service center about the scratched bobbin case.
- Using improper needle or thread for the selected fabric
- Match the needle and thread to the fabric using the manual’s combination chart.
- A bobbin designed specifically for this machine is not used
- Use a bobbin designed for this model.
The thread is tangled on the wrong side of the fabric3 checks
- Upper threading is incorrect
- Rethread the upper thread correctly.
- Using improper needle or thread for the selected fabric
- Match the needle and thread to the fabric using the manual’s combination chart.
- Follow the manual’s detailed procedure
- Remove trapped thread, cutting it if needed, remove the upper thread, and rethread correctly. Reinstall the bobbin if it was removed.
The upper thread is too tight2 checks
- The bobbin thread is incorrectly installed
- Install the bobbin thread correctly; tightening the upper tension cannot fix an incorrectly threaded bobbin.
- Follow the manual’s detailed procedure
- Install the bobbin correctly and guide the thread through its slot before changing upper tension.
Bobbin thread breaks5 checks
- Bobbin is set incorrectly
- Install the bobbin correctly and guide its thread through the bobbin-case slot.
- Bobbin thread is incorrectly wound
- Rewind the bobbin correctly.
- A scratched bobbin is being used
- Replace the scratched bobbin.
- Thread is tangled
- Switch off, remove the trapped thread, and clean the race before rethreading.
- A bobbin designed specifically for this machine is not used
- Use a bobbin designed for this model.
Fabric puckers7 checks
- There is a mistake in the upper or bobbin threading
- Rethread the upper thread and reinstall the bobbin correctly.
- Spool of thread is set incorrectly
- Fit the spool and the correct spool cap securely.
- Using improper needle or thread for the selected fabric
- Match the needle and thread to the fabric using the manual’s combination chart.
- Needle is turned, bent or the point is dull
- Replace the damaged or dull needle with a straight one.
- Stitches are too long when sewing thin fabrics
- Shorten the stitch length when sewing thin fabric.
- Thread tension is set incorrectly
- Check both thread paths, then adjust thread tension on a scrap of the project fabric.
- Wrong presser foot was used
- Fit the presser foot specified for the stitch.
The stitch is not sewn correctly4 checks
- The presser foot that is used is not appropriate for the type of stitch that you wish to sew
- Choose the presser foot specified for the selected stitch.
- The thread tension is incorrect
- Check threading and set the appropriate thread tension.
- The thread is tangled, for example, in the bobbin case
- Switch off, remove the trapped thread, and clean the race before rethreading.
- Feed dogs are set in the down position
- Move the feed-dog position switch to the right to raise the feed dogs.
Skipped stitches6 checks
- Machine is threaded incorrectly
- Correct the upper and bobbin threading.
- Using improper needle or thread for the selected fabric
- Match the needle and thread to the fabric using the manual’s combination chart.
- Needle is turned, bent or the point is dull
- Replace the damaged or dull needle with a straight one.
- Needle is installed incorrectly
- Turn the machine off and install the needle correctly.
- Dust or lint has collected under the needle plate
- Switch off and clean beneath the needle plate.
- Thin or stretch fabrics are being sewn
- Sew with non-woven water-soluble stabilizer beneath the fabric.
Not stitching3 checks
- Needle is turned, bent or the point is dull
- Replace the damaged or dull needle with a straight one.
- Bobbin is set incorrectly
- Install the bobbin correctly and guide its thread through the bobbin-case slot.
- Upper threading is incorrect
- Rethread the upper thread correctly.
High-pitched sound while sewing5 checks
- Dust or lint is caught in the feed dogs
- Switch off and clean lint from the feed dogs.
- Pieces of thread are caught in the race
- Switch off and clear loose thread from the race.
- Upper threading is incorrect
- Rethread the upper thread correctly.
- A bobbin designed specifically for this machine is not used
- Use a bobbin designed for this model.
- There are needle holes or friction scratches in the bobbin case
- Contact a Brother authorized service center about damage to the bobbin case.
Fabric does not feed through the machine6 checks
- Feed dogs are set in the down position
- Move the feed-dog position switch to the right to raise the feed dogs.
- Stitches are too close together
- Increase stitch length so the fabric can advance.
- Wrong presser foot was used
- Fit the presser foot specified for the stitch.
- Needle is turned, bent or the point is dull
- Replace the damaged or dull needle with a straight one.
- Thread is entangled
- Stop sewing, switch off, and clear the tangled thread.
- Zigzag foot “J” is slanted on a thick seam at the beginning of stitching
- Keep zigzag foot J level at the start of the thick seam using the manual’s thick-fabric procedure.
The fabric feeds in the opposite direction1 check
- The feed mechanism is damaged
- Contact a Brother authorized service center about the damaged feed mechanism.
The needle contacts the needle plate2 checks
- The needle clamp screw is loose
- Turn the machine off and tighten the needle-clamp screw.
- Needle is turned, bent or the point is dull
- Replace the damaged or dull needle with a straight one.
Fabric being sewn with the machine cannot be removed1 check
- Thread is tangled below the needle plate
- Stop sewing and switch off.
- Remove the needle and foot, lift the fabric and cut trapped threads, then remove the needle-plate cover, bobbin, and bobbin case to clear the race.
- If fabric remains trapped, follow the needle-plate removal procedure on PDF pages 61–62; stop and seek Brother service if it cannot be freed.
A broken needle has fallen into the machine1 check
- Turn off the machine, and remove the needle plate. If the needle that fell into the machine can be seen, use tweezers to remove it. After removing the needle, return the needle plate to its original position and insert a new needle. Before turning on the machine, slowly turn the handwheel toward you to check that it turns smoothly and that the new needle enters through the center of the needle plate opening. If the handwheel does not turn smoothly or the needle that fell into the machine cannot be removed, consult your authorized Brother dealer or the nearest Brother authorized service center
- Switch off and remove the needle plate.
- Retrieve a visible needle fragment with tweezers, reinstall the plate, and fit a new needle.
- Before powering on, turn the handwheel slowly toward you and check needle clearance.
- Seek Brother service if the fragment cannot be recovered or the wheel does not turn smoothly.
The handwheel does not turn smoothly1 check
- Thread is tangled in the bobbin case
- Switch off, remove the trapped thread, and clean the race before rethreading.
Thread tension is incorrect9 checks
- Upper threading is incorrect
- Rethread the upper thread correctly.
- Bobbin is set incorrectly
- Install the bobbin correctly and guide its thread through the bobbin-case slot.
- Using improper needle or thread for the selected fabric
- Match the needle and thread to the fabric using the manual’s combination chart.
- Presser foot holder is not attached correctly
- Attach the presser-foot holder correctly.
- Thread tension is set incorrectly
- Check both thread paths, then adjust thread tension on a scrap of the project fabric.
- Bobbin thread is incorrectly wound
- Rewind the bobbin correctly.
- Needle is turned, bent or the point is dull
- Replace the damaged or dull needle with a straight one.
- A bobbin designed specifically for this machine is not used
- Use a bobbin designed for this model.
- Follow the manual’s detailed procedure
- Start at tension setting 4 after correcting both thread paths, then match needle and thread to the fabric and test the tension.
Decorative stitch patterns are misaligned2 checks
- Wrong presser foot was used
- Fit the presser foot specified for the stitch.
- Stitch pattern adjustment settings were set incorrectly
- Adjust the decorative stitch pattern using the manual’s stitch-pattern adjustment procedure.
Stitch pattern is irregular5 checks
- Wrong presser foot was used
- Fit the presser foot specified for the stitch.
- Thin or stretch fabrics are being sewn
- Place stabilizer beneath thin or stretch fabric.
- Thread tension is set incorrectly
- Check both thread paths, then adjust thread tension on a scrap of the project fabric.
- Fabric was pulled, pushed or fed at an angle while it was being sewn
- Guide the fabric straight with your hands without pulling or pushing it sideways.
- The thread is tangled, for example, in the bobbin case
- Switch off, remove the trapped thread, and clean the race before rethreading.