MODEL REFERENCE
Brother SE425
29 errors · 21 troubleshooting topics
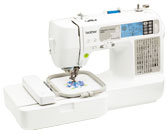
The checks and guides below come from the official manuals for this model.
No matches for this wording. Try a light name, error code or a shorter phrase.
Error messages
Shown on the machine display —Cannot recognize the data: pattern may be corrupted
Choose a valid pattern file or card; the selected pattern data cannot be read.
—Cannot sew on this screen
Return to the sewing screen before pressing start/stop or reverse.
—Change the speed controller mode to OFF
Turn off speed-controller stitch-width adjustment, or choose a stitch that supports it.
—Change to single needle mode
Switch to single needle mode or choose a stitch compatible with twin needles.
—Check and rethread the upper thread
Stop and rethread the upper path; replace exhausted thread before sewing again.
—Deleting a pattern
Wait for the machine to finish deleting the stored pattern.
—Disconnect the foot controller
Disconnect the foot controller to use start/stop; embroidery cannot use the foot controller.
—Insert an embroidery card
Insert a compatible embroidery card before selecting its on-screen key.
—Lower the presser foot lever
Lower the presser foot before starting or cutting thread.
—Not enough available memory
Delete an unneeded saved pattern before trying to save another.
—Confirm deleting the selected pattern
Confirm the selected pattern change or return without deleting it.
—Confirm saving the current settings
Confirm whether to save the changed stitch settings.
—Raise the needle before changing embroidery pattern
Raise the needle before selecting or rearranging an embroidery pattern.
—Raise the presser foot lever
Lift the embroidery foot before initializing the embroidery unit.
—Retrieve the saved pattern
Retrieve the stored pattern before pressing start/stop.
—Return the bobbin winding shaft to the left
Move the bobbin winder shaft left before using the stitch, needle-position or cutter controls.
—Saving a pattern
Wait until pattern saving finishes.
—Select a pattern
Select a pattern before pressing start/stop or reverse.
—Bobbin thread is running out
Replace the bobbin or replenish its thread before continuing.
—Embroidery unit carriage will move
Keep hands and objects clear while the embroidery carriage moves.
—Pattern too large for embroidery frame
Use fewer characters or a larger compatible embroidery frame.
—Safety device activated: tangled upper thread
Stop the machine, turn off power, clear tangled thread around the bobbin case and inspect the needle.
—Embroidery card cannot be used on this machine
Use an embroidery card and hoop format compatible with this machine.
—Pattern cannot be used on this machine
Select a pattern intended for this machine.
—Attach the embroidery unit
Turn off the machine and attach the embroidery unit before using embroidery controls.
—Winding bobbin thread
Allow bobbin winding to finish before starting another operation.
Troubleshooting
Find the problem you are experiencingThe sewing machine does not operate5 checks
- The machine is not turned on
- Switch on the machine.
- The start/stop button was not pressed
- Use the start/stop button to begin sewing.
- The presser foot lever is raised
- Lower the presser foot before starting.
- The start/stop button was pressed, even though the foot controller is connected
- Disconnect the foot controller if using the start/stop button, or operate the connected controller instead.
- The bobbin winder shaft is on the right side after winding the bobbin
- Return the bobbin winder shaft to the left after winding.
The needle breaks13 checks
- The needle is incorrectly installed
- Reinstall the needle securely in the correct orientation.
- The needle clamp screw is loose
- Tighten the needle clamp screw with the screwdriver.
- The needle is bent or blunt
- Fit a new needle.
- The combination of fabric, thread and needle is not correct
- Choose needle and thread sizes suited to the fabric using the manual chart.
- The presser foot that is used is not appropriate for the type of stitch that you wish to sew
- Fit the presser foot specified for the selected stitch.
- The upper thread tension is too tight
- Reduce the upper thread tension.
- The fabric is pulled too much
- Guide the fabric gently without pulling it through the machine.
- The spool is incorrectly installed
- Seat the spool correctly on its pin.
- The area around the hole in the needle plate is scratched, or has a burr on it
- Ask an authorized Brother dealer or service center to replace the damaged needle plate.
- The area around the hole in the presser foot is scratched, or has a burr on it
- Ask an authorized Brother dealer or service center to replace the damaged presser foot.
- The bobbin case is scratched, or has a burr on it
- Ask an authorized Brother dealer or service center to replace the damaged bobbin case.
- A bobbin designed specifically for this machine is not used
- Use the bobbin specified for this machine; incompatible bobbins may not feed correctly.
- The upper thread was not threaded correctly
- Rethread the upper thread along the prescribed path.
The upper thread breaks10 checks
- The upper thread was not threaded correctly (for example, the spool is not installed correctly, the spool cap is too big for the spool being used, or the thread has come out of the needle bar thread guide.)
- Rethread the upper thread and use a spool cap that matches the spool size.
- There are knots or tangles in the thread
- Clear knots and tangles from the thread.
- The selected needle is not appropriate for the thread being used
- Fit a needle suitable for the thread in use.
- The upper thread tension is too tight
- Reduce the upper thread tension.
- The thread is tangled, for example, in the bobbin case
- Remove tangled thread and clean the race if the thread caught around the bobbin case.
- The needle is bent or blunt
- Fit a new needle.
- The needle is incorrectly installed
- Reinstall the needle securely in the correct orientation.
- The area around the hole in the presser foot is scratched, or has a burr on it
- Ask an authorized Brother dealer or service center to replace the damaged presser foot.
- The bobbin case is scratched, or has a burr on it
- Ask an authorized Brother dealer or service center to replace the damaged bobbin case.
- A bobbin designed specifically for this machine is not used
- Use the bobbin specified for this machine; incompatible bobbins may not feed correctly.
Bobbin thread does not wind neatly on the bobbin3 checks
- The thread is not passed through the bobbin-winding thread guide correctly
- Route the thread correctly through the bobbin-winding guide.
- Bobbin spins slowly
- Move the sewing speed controller right to increase bobbin winding speed.
- The thread that was pulled out was not wound onto the bobbin correctly
- Wrap the thread around the bobbin five or six turns clockwise before winding.
The lower thread is tangled or breaks4 checks
- The bobbin thread is incorrectly installed
- Reinstall the bobbin thread following the lower-thread path.
- The bobbin is scratched or does not rotate smoothly, or has a burr on it
- Replace a scratched or rough bobbin.
- The thread is tangled
- Clear the tangled thread and clean the race.
- A bobbin designed specifically for this machine is not used
- Use the bobbin specified for this machine; incompatible bobbins may not feed correctly.
The thread is tangled on the wrong side of the fabric1 check
- The upper thread was not threaded correctly
- Rethread the upper thread along the prescribed path.
The thread tension is incorrect6 checks
- The upper thread was not threaded correctly
- Rethread the upper path, making sure the thread catches the spring on the left of the guide cover.
- The bobbin thread is incorrectly installed
- Reinstall the bobbin thread following the lower-thread path.
- The combination of fabric, thread and needle is not correct
- Choose needle and thread sizes suited to the fabric using the manual chart.
- The presser foot holder is incorrectly installed
- Reinstall the presser foot holder correctly.
- The thread tension is incorrect
- Set the upper thread tension for the stitch and fabric.
- A bobbin designed specifically for this machine is not used
- Use the bobbin specified for this machine; incompatible bobbins may not feed correctly.
The upper thread is too tight1 check
- The bobbin thread is incorrectly installed
- Reinstall the bobbin thread following the lower-thread path.
The fabric is wrinkled6 checks
- The upper thread was not threaded correctly, or the bobbin is incorrectly installed
- Rethread the upper path and reinstall the bobbin thread.
- The spool is incorrectly installed
- Seat the spool correctly on its pin.
- The combination of fabric, thread and needle is not correct
- Choose needle and thread sizes suited to the fabric using the manual chart.
- The needle is bent or blunt
- Fit a new needle.
- If thin fabrics are being sewn, the stitch is too coarse
- Use a shorter stitch or place stabilizer beneath thin fabric.
- The thread tension is incorrect
- Set the upper thread tension for the stitch and fabric.
Stitches are skipped5 checks
- The upper thread was not threaded correctly
- Rethread the upper thread along the prescribed path.
- The combination of fabric, thread and needle is not correct
- Choose needle and thread sizes suited to the fabric using the manual chart.
- The needle is bent or blunt
- Fit a new needle.
- The needle is incorrectly installed
- Reinstall the needle securely in the correct orientation.
- Dust has accumulated under the needle plate or in the bobbin case
- Remove the needle plate cover and clean the race below it.
A high-pitched noise is made while sewing4 checks
- Dust has accumulated in the feed dogs or in the bobbin case
- Clean lint from the race and feed dog area.
- The upper thread was not threaded correctly
- Rethread the upper thread along the prescribed path.
- The bobbin case is scratched, or has a burr on it
- Ask an authorized Brother dealer or service center to replace the damaged bobbin case.
- A bobbin designed specifically for this machine is not used
- Use the bobbin specified for this machine; incompatible bobbins may not feed correctly.
The thread does not pass through the eye of the needle2 checks
- The needle has not been raised to the correct position
- Raise the needle with the needle position button.
- The needle is incorrectly installed
- Reinstall the needle securely in the correct orientation.
The stitch is not sewn correctly3 checks
- The presser foot that is used is not appropriate for the type of stitch that you wish to sew
- Fit the presser foot specified for the selected stitch.
- The thread tension is incorrect
- Set the upper thread tension for the stitch and fabric.
- The thread is tangled, for example, in the bobbin case
- Clear the thread tangle and clean the race if the bobbin case is involved.
The fabric does not feed4 checks
- The feed dogs are lowered
- Move the drop feed lever right to raise the feed dogs.
- The stitch is too fine
- Increase the stitch length.
- The presser foot that is used is not appropriate for the type of stitch that you wish to sew
- Fit the presser foot specified for the selected stitch.
- The thread is tangled, for example, in the bobbin case
- Remove tangled thread and clean the race if the thread caught around the bobbin case.
The fabric feeds in the opposite direction1 check
- The feed mechanism is damaged
- Have an authorized Brother dealer or service center inspect the machine.
The needle threader lever does not lower to the correct position1 check
- The needle has not been raised to the correct position
- Raise the needle with the needle position button.
The sewing lamp does not come on2 checks
- The sewing lamp is damaged
- Have an authorized Brother dealer or service center inspect the machine.
- The machine is not turned on
- Switch on the machine.
Nothing appears in the LCD1 check
- The brightness of the LCD is either too light or too dark
- Adjust the LCD brightness until the screen is visible.
Machine does not operate when embroidery key is pressed1 check
- The embroidery unit is not attached
- Attach the embroidery unit before using its controls.
Embroidery unit does not move2 checks
- No pattern selected
- Select an embroidery pattern before starting.
- The embroidery unit is not set up correctly
- Attach and set up the embroidery unit following its setup instructions.
Embroidery not neatly done11 checks
- The fabric is not fully stretched on the embroidery frame. The fabric is loose
- Stretch and secure the fabric evenly in the embroidery frame.
- No stabilizer material is attached
- Place stabilizer behind the fabric before embroidering.
- The thread is tangled and the bobbin case, etc., is plugged up
- Remove tangled thread; clean the race if the bobbin area is blocked.
- The thread tension is incorrect
- Set the upper thread tension for the stitch and fabric.
- The upper thread was not threaded correctly
- Rethread the upper path, making sure the thread catches the spring on the left of the guide cover.
- The bobbin thread is incorrectly installed
- Reinstall the bobbin thread following the lower-thread path.
- Objects are placed near the carriage or embroidery frame
- Clear objects from the full travel area of the embroidery frame and carriage.
- Material coming out of the embroidery frame is causing problems
- Rehoop the fabric so the overhanging material cannot catch, then rotate the pattern if needed.
- A heavy fabric is being embroidered, and the fabric is hanging off the table
- Support heavy fabric on the table so its weight does not restrict frame movement.
- The fabric is catching. It is pinched
- Stop the machine and free and reset the pinched fabric.
- The carriage was moved while the embroidery frame was being removed or attached during embroidery
- Keep the carriage steady when fitting or removing the embroidery frame.