MODEL REFERENCE
Brother FAX-2950
29 errors · 62 troubleshooting topics · 4 guides
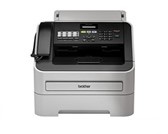
The checks and guides below come from the official manuals for this model.
No matches for this wording. Try a light name, error code or a shorter phrase.
Errors and messages
Shown on the machine display Cartridge Errortoner cartridge problem
Remove the drum assembly, take out the toner cartridge and reseat it in the drum, then refit the assembly.
Comm.Errorfax communication failed
Send the fax again or try another telephone line. Ask the telephone company to check the line if errors continue.
Connection Failpolling connection failed
Check that the remote fax machine is set to Polled Waiting before polling it.
Cooling Down Wait for a whilefuser or drum temperature problem
- Listen for the cooling fan and clear obstructions around the exhaust outlet.
- If the fan runs, leave the machine powered on but unused for several minutes.
- If the fan does not run, turn the switch off, wait a few seconds, restart and leave it idle for 15 minutes.
Cover is Opena cover is open4 checks
Disconnectedthe fax call ended
Try sending or receiving the fax again; the remote caller or fax machine ended the call.
Document Jamdocument jam
- Remove unjammed originals, open the control-panel cover and pull the trapped document toward the front.
- Close the cover and press Stop/Exit.
- Check the original fits the document feeder’s limits before retrying.
Drum Errordrum unit needs attention
Clean the drum’s corona wire using its green sliding tab and return the tab to Home.
Drum Stopdrum unit needs attention
Replace the drum using the documented removal and installation sequence.
DR Mode in Usedistinctive Ring is active
Not used in New Zealand.For regions other than New Zealand, turn Distinctive Ring off before changing Receive Mode. Use the region-specific telephone-service menu described in the guide.
EL Errormechanical fault
Open the front cover and close it again.
Faxability OnfaxAbility prevents changing receive mode
New Zealand only.For New Zealand, set FaxAbility to Off before changing Receive Mode.
Fuser Errorfuser or drum temperature problem2 checks
Init Unable XXmechanical fault
Turn the power switch off, wait a few seconds and turn it on again. Leave the machine powered on and idle for 15 minutes. Contact Brother or your local dealer if the fault remains.
Jam Insidepaper jam
- Leave the machine on for ten minutes to cool.
- Remove the drum/toner assembly and gently clear the paper.
- Use the manual’s inside-jam procedure, including checking inside the drum assembly, then refit it and close the covers.
Jam Rearpaper jam
- Leave the machine on for ten minutes to cool before opening the rear path.
- Pull down the tabs to release the fuser cover, gently remove paper with both hands, then close the fuser and rear covers and refit the drum/toner assembly.
Jam Traypaper jam
Pull the tray completely out and gently remove jammed paper with both hands. Keep the remaining stack below the maximum mark, set its guides to the correct size and refit the tray.
Manual Feedmanual feed slot is empty
Put one sheet into the manual feed slot, with its guides adjusted to the sheet.
No Paperpaper is missing or loaded incorrectly
Refill the tray or remove and reload the paper, then press Start. If it still cannot feed, clean the paper pick-up rollers.
No Response/Busyfax number is busy or unanswered
Check the fax number and try again when the line is available.
No Tonertoner supply needs attention
Remove the drum assembly, reseat its toner cartridge and refit the assembly.
Out of Memorymemory is full
- For sending or copying, press Start to process the pages already scanned, or press Stop/Exit and wait for other work to finish.
- Print stored faxes and turn off Fax Storage to free memory.
- For a computer print job, reduce resolution or clear stored faxes, then retry.
Print Unable XXmechanical fault
Turn the power switch off, wait a few seconds and turn it on again. Leave the machine powered on and idle for 15 minutes. Contact Brother or your local dealer if the fault remains.
Replace Drumdrum unit needs attention2 checks
Replace Tonertoner supply needs attention
- With Toner set to Stop, install a new unused compatible Brother toner cartridge.
- Continue mode can print until Toner Ended; it does not replace the exhausted cartridge.
- Incoming faxes can remain in memory while space is available.
Scan Unable XXmechanical fault
Turn the power switch off, wait a few seconds and turn it on again. Leave the machine powered on and idle for 15 minutes. Contact Brother or your local dealer if the fault remains.
Size mismatchpaper size mismatch
Load the correct paper size and set Paper Size under Menu, 1, 2, 2 to match.
Toner Endedtoner supply needs attention
Replace the toner cartridge. Incoming faxes can be stored while memory remains available.
Toner Lowtoner supply needs attention
Order a replacement toner cartridge before Replace Toner or Toner Ended appears. Printing remains available for now.
Troubleshooting
Find the problem you are experiencingReceived fax is condensed, streaked or missing linesView
Make a copy to test local print quality. If the copy is good, ask the sender to resend; telephone-line noise or interference can distort the received fax.
Received fax has poor print qualityView
Use the print-quality checks below after making a test copy to separate a local printing fault from a sender or line problem.
Received fax has vertical black linesView
Clean the corona wire. Ask the sender to make a copy to check their scanner, then try receiving from a different machine. Contact your dealer if lines remain.
Received faxes split across pagesView
Set the machine’s paper size to match the loaded paper and turn on Auto Reduction for incoming faxes.
Dialing does not work3 steps
- Check for dial tone, all line-cord connections, power and the power switch.
- Outside New Zealand, check Tone/Pulse.
- To test manually, press Hook/Hold, dial and wait for fax tones before pressing Start.
Machine does not answer calls3 steps
- Choose the Receive Mode for the connected phones or answering machine.
- Check dial tone and call your fax number.
- Recheck the line cord; ask the telephone company to check the line if it does not ring.
Cannot receive a fax6 steps
- Check dial tone and static with Hook/Hold, the wall and LINE connections, and the service provider’s instructions for DSL or VoIP.
- Choose Fax Only for a dedicated automatic fax line, External TAD for an answering machine, Fax/Tel for shared automatic calls or Manual for calls you answer yourself.
- Test whether another device answers first: temporarily reduce Fax Only/Fax/Tel delay to one ring, or the answering machine to two rings; do not adjust delay in Manual.
- Send a test fax and restore the original delay afterward.
- Configure External TAD with one or two rings, five seconds of silence at the start of its greeting and no more than 20 seconds of speech.
- Include the Remote Activation Code in the greeting, enable Fax Detect and, for repeated line interference, try Basic(for VoIP).
Poor sending qualityView
Try Fine or S.Fine resolution, make a copy to test the scanner and clean the scanner glass if that copy is poor.
Transmission report says RESULT:ERROR3 steps
- Send the fax again if the line has temporary noise or static.
- Ask the telephone company to check persistent interference, or try Basic(for VoIP) under Compatibility.
- The PC-Fax RESULT:NG branch in this guide does not name FAX-2950 and is not applied here.
Sent faxes are blankView
Load the original face down into the automatic document feeder in the direction shown in the guide.
Vertical black lines when sendingView
Turn off and unplug before cleaning. Wipe dirt or correction fluid from the scanner’s glass strip, then reconnect and send a test fax.
Voices trigger fax receiving tonesView
Press Stop/Exit to end the mistaken fax response. Turn Fax Detect off if voices or music repeatedly trigger receiving tones.
Send a fax call from an extension phone2 steps
- Enter the Remote Activation Code when a fax call arrives, then hang up after the machine answers.
- The documented default is *51, or *91 in New Zealand; use the configured code if changed.
Telephone features interrupt fax calls2 steps
- Call Waiting, Voice Mail, alarms and other shared-line services can interrupt faxes.
- ECM can reduce the effect, but use a separate line without those features if interruptions are unacceptable.
Cannot make a copyView
Press COPY and confirm its mode light before retrying.
Vertical black lines in copiesView
Clean the scanner glass strip and the drum’s corona wire. Return its green tab to Home afterward.
Copies are blankView
Load the original correctly in the automatic document feeder, face down as illustrated.
No computer printout4 steps
- Check power, toner/drum installation and the USB interface cable at both ends.
- Select the correct installed printer driver, clear displayed errors and check the printer is online.
- In the Windows print queue, clear Use Printer Offline.
- The operating-system screenshots in this legacy guide describe its original software, not current OS support.
Unexpected or garbled printout3 steps
- Press Stop/Exit to cancel jobs and check the application is configured for this printer.
- If needed, remove the tray, wait for printing to stop, switch off and disconnect power for several minutes.
- The guide warns that stored faxes are deleted by this procedure; transfer important faxes or the Fax Journal first.
Text disappears after the first pagesView
Check the application’s printer settings and secure the USB interface cable, since an unrecognized full-buffer signal can drop data.
Printing stops before the job completesView
Press Stop/Exit to cancel and clear the job. An incomplete page can print while cancellation clears memory; resend the job afterward.
TWAIN or WIA error on WindowsView
Select the Brother TWAIN or WIA driver as the scanning application’s source. In the manual’s PaperPort 12SE workflow, use Scan Settings, Scan or Get Photo, then Select.
TWAIN or ICA error on Mac3 steps
- Select Brother TWAIN as the scan source.
- The guide’s PageManager workflow uses File, Select Source; its Mac OS X 10.6/10.7 workflow also permits ICA.
- Check current software availability before using these legacy instructions.
OCR does not workView
Increase scan resolution. For the Mac workflow in this guide, install the supported Presto! PageManager package supplied for the model.
Software installation or printing failsView
For the Windows software supplied with this model, run Repair MFL-Pro Suite from its installation disc to repair or reinstall it.
Two-in-one or four-in-one printing failsView
Set the same paper size in the application and printer driver.
Adobe Illustrator does not printView
Reduce the print resolution and resend the document.
Paper does not feed3 steps
- Load a straight stack, turn it over if needed and reduce the tray’s paper amount.
- Clear Manual feed in the driver when using the tray.
- Clean the pick-up rollers and follow the displayed jam procedure if paper remains trapped.
Documents do not feed or are skewedView
Clean the document-feed rollers using the documented procedure.
Choose compatible paperView
Use thin, plain, bond or recycled paper, or envelopes and labels made for laser printers, within the guide’s size and weight limits. Feed envelopes through the manual slot.
Paper is jammedView
Use the specific tray, rear or inside-jam procedure below. Let hot internal parts cool before opening the rear or inside path.
Printed pages are curledView
Turn the stack over, use suitable paper and match Paper Type to the media. Check room humidity and temperature if curling persists.
Printed pages are smearedView
Match Paper Type to the actual media. Avoid overly thick or rough paper and check the driver’s media setting.
Printouts are too lightView
Turn Toner Save off in the machine for copies and received faxes, and in the driver for computer prints. Increase Print Density under Menu, 2, 1, 6 for FAX-2950.
Machine will not turn onView
Switch off, unplug and wait ten minutes, then reconnect and switch on. If still off, switch off again and try another known working wall outlet.
Faint print3 steps
- Gently rock the drum/toner assembly side to side to distribute toner.
- Check temperature and humidity, turn Continue mode off if toner is exhausted, and disable Toner Save in the machine or driver.
- Clean the corona wire, replace toner then drum as needed, and increase Print Density under Menu, 2, 1, 6.
Gray backgroundView
Use suitable paper, check humidity and temperature, and clean the drum. Replace the toner, then the drum if the background remains gray.
Repeated ghost images2 steps
- Use suitable smooth paper, match driver media type and select Reduce Ghosting.
- Check temperature and humidity, clean the drum, replace toner or drum if needed, and contact Brother for a suspected contaminated fuser.
Toner specksView
Use suitable paper, clean the corona wire and drum surface, and replace a damaged drum. Contact Brother for a suspected contaminated fuser.
Hollow printView
Use suitable smooth paper and choose Thick Paper in the driver, or use thinner paper. Check humidity and replace a damaged drum if necessary.
Entire page prints blackView
Clean the corona wire and replace a damaged drum. Ask Brother to check a contaminated fuser; do not attempt fuser repair.
White lines across pageView
Use suitable media and match driver paper type. Print several pages after a long idle period, clean the drum and replace it if damaged.
Horizontal lines across pageView
Clean the corona wire and drum surface. Replace the drum if horizontal lines remain.
White bands or ribbingView
Check temperature and humidity, clean the drum and replace it if the bands persist.
White or black spots every 94 mmView
Make ten copies of a blank white sheet. If spots persist, clean the drum surface with the documented procedure and replace a damaged drum.
Black toner marks across page2 steps
- Check for label adhesive on the drum, avoid paper clips or staples and consider whether direct sunlight damaged an unpacked drum.
- Clean the drum and replace damaged toner or drum supplies.
Black vertical lines or toner stainsView
Clean the corona wire and return its green tab to Home. Replace damaged toner or drum supplies, and contact Brother for a contaminated fuser.
White vertical lines2 steps
- Check whether exhausted toner is being used in Continue mode.
- Clear foreign material such as torn paper or sticky notes from around the toner/drum assembly, then replace toner or drum if needed.
Image prints at an angle4 steps
- Load the paper squarely without squeezing its guides or overfilling the tray.
- Adjust manual-feed guides when using that slot.
- Check paper quality and remove loose scraps.
- Return the two green envelope levers and the two Anti-Curl levers to their original positions.
Curled or wavy paper3 steps
- Check paper quality, humidity and temperature.
- If paper sat unused, turn its stack over and rotate it 180 degrees.
- Open the rear straight-through output and choose Reduce Paper Curl in the driver.
Wrinkles or creasesView
Reload suitable paper correctly. Turn the stack over or rotate it 180 degrees before retrying.
Printed envelopes creaseView
Lower both green rear envelope levers while printing envelopes and restore them to their original positions afterward.
Toner does not fuse to paperView
Return both green rear envelope levers to their upward positions. Choose Improve Toner Fixing in the driver; if that fails, choose Thicker Paper in Media Type.
Paper remains curled2 steps
- Choose Reduce Paper Curl and turn the paper over, except letterhead.
- If curling persists, follow the illustrated Anti-Curl procedure: open the rear cover, lift the designated levers and slide both gray levers in the arrow direction.
Clear a document jamView
Remove loose originals, open the control-panel cover and pull the jammed sheet gently toward the front. Close the cover and press Stop/Exit.
Clear a tray paper jamView
Pull the tray completely out and gently remove jammed paper with both hands. Keep the remaining stack below the maximum mark, set its guides to the correct size and refit the tray.
Clear a rear paper jam2 steps
- Leave the machine on for ten minutes to cool before opening the rear path.
- Pull down the tabs to release the fuser cover, gently remove paper with both hands, then close the fuser and rear covers and refit the drum/toner assembly.
Clear an inside paper jam3 steps
- Leave the machine on for ten minutes to cool.
- Remove the drum/toner assembly and gently clear the paper.
- Use the manual’s inside-jam procedure, including checking inside the drum assembly, then refit it and close the covers.
Reduce line interference or VoIP fax errors3 steps
- Open Menu, 2, 0, 1, select the required Compatibility setting and press OK, then Stop/Exit.
- Basic(for VoIP) lowers speed to 9600 bps; ECM then applies only to sending.
- Normal uses 14400 bps and High uses 33600 bps on FAX-2950.
Reset the machineView
Choose Menu, 0 and Reset, select the reset function, confirm and choose whether to reboot. A reset can clear stored settings; use the least broad reset that fits the problem.
Guides
Cleaning the scanner glass
Instructions from the manualClean the scanner glass3 steps
- Switch off and unplug the machine and line connections as the guide directs.
- Open the control-panel cover and gently wipe the glass strip and adjacent white bar with a lint-free cloth dampened with water.
- Close the cover and reconnect before testing.
Cleaning the corona wire
Instructions from the manualClean the corona wire3 steps
- Open the front cover and leave the machine on for ten minutes to cool.
- Switch off, remove the drum/toner assembly, place it on disposable paper and avoid the electrodes.
- Slide the green corona-wire tab left and right several times, return it to Home, refit the assembly and close the cover.
Cleaning the document feed
Instructions from the manualClean the document-feed and pick-up rollers4 steps
- Switch off and disconnect the line and power.
- For the document feeder, open its cover and wipe the document feed with a soft dry lint-free cloth, then close.
- For tray feeding, remove the tray and clean both pick-up rollers and the separator pad with a well-wrung lukewarm cloth.
- Dry, refit and reconnect.
Replacing the toner cartridge
Instructions from the manualReplace toner and drum6 steps
- Use the model’s regional supplies.
- Open the front cover and remove the drum/toner assembly.
- Release the toner with its green lock lever and fit the new cartridge or drum.
- Clean the corona wire, return its tab to Home and refit the assembly.
- For a new drum only, reset its counter after fitting.
- Keep toner away from flames and wash spills with cold water.
Model details
Model and compatibility
- Regional guide
- This reference uses Brother’s Asia/Oceania FAX-2840/FAX-2950 guide. Telephone-service settings and supplies vary by region. [1]
- Toner
- Asia supplies are TN-2260 or TN-2280; Oceania supplies are TN-2230 or TN-2250. Match the country and machine label before buying. [1]
- Drum
- The guide lists DR-2255 for Asia and DR-2225 for Oceania. Drum and toner are separate supplies. [1]