MODEL REFERENCE
Brother 2340CV
11 troubleshooting topics · 1 guide
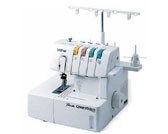
The checks and guides below come from the official manuals for this model.
No matches for this wording. Try a light name, error code or a shorter phrase.
Troubleshooting
Find the problem you are experiencingNeedle thread is too loose3 steps
- For the selected coverstitch or chain stitch, raise the needle-thread tension dial.
- Alternatively, lower the looper-tension dial to loosen the looper thread.
- Sew a test seam and adjust again if needed.
Needle thread is too tightView
Lower the needle-thread tension dial, or raise the looper-tension dial to tighten the looper thread. Test on a scrap of the same fabric before sewing the garment.
Fabric puckers or stretches while feeding4 steps
- Adjust the differential feed for the fabric and test a seam.
- A setting below 1 stretches lightweight fabric to prevent puckering; above 1 gathers stretchy fabric to reduce waves.
- Start at 1, test a scrap, and avoid differential feed on thick non-stretch fabric such as denim.
- The manual allows a differential ratio of 0.7–2.0.
Replace or refit the needles4 steps
- Turn off the power.
- Use the handwheel to raise the needle fully, loosen the correct set screw and remove the needle.
- Insert a straight compatible needle with its flat side toward the back, push it fully up and tighten the screw.
- Use the proper needle positions for the stitch; lightly tighten unused-position screws.
Thread the needles and looper6 steps
- Turn off the machine before threading.
- Raise the presser foot and needles, then follow each color-coded path shown in the guide.
- Hold the tension-release button right while seating thread in the tension discs.
- For the looper, follow the blue path, pull the release lever at the indicated step, thread the eye and return the looper until it locks.
- Close the front cover.
- Thick decorative looper thread uses the alternate route shown on manual page 10.
Prepare a three-needle coverstitch3 steps
- Install left, center and right needles and thread them plus the looper for a 6 mm coverstitch.
- Start with each needle-tension dial at 4 and looper tension at 4, seat the threads in the tension discs and sew a test seam.
- Adjust for balanced top stitches and underside loops.
Prepare a two-needle coverstitch3 steps
- For a 6 mm coverstitch, use the left and right needles; for 3 mm, use left and center.
- Thread both needles and the looper, tighten unused needle-position screws and start each active tension dial at 4.
- Test and adjust before hemming.
Prepare a chain stitch2 steps
- Use the center needle and looper only.
- Tighten screws at unused needle positions, thread the illustrated paths, set the starting tension shown in the guide and sew a test seam before adjusting.
Remove the fabric without pulling the seam4 steps
- Turn the handwheel toward you until the needles are highest, raise the presser foot and hold the fabric.
- Push the appropriate needle tension-release buttons right, then slowly draw the fabric toward the back.
- Cut the needle threads above the fabric, pull gently again to bring their ends to the back, cut the looper thread and tie the ends together.
- Keep clear of the hot bulb.
Hem a garment with coverstitch2 steps
- Fold and press the hem, measure and mark the folded edge position from the top, and align the left needle just to the left of that mark.
- Sew along the mark, then remove the fabric using the tension-release procedure.
Finish a tubular garment seam2 steps
- Raise the foot, position the garment, lower the foot and sew.
- Overlap the beginning and end by about 4 cm, then remove the garment with the documented thread-release procedure and secure the ends.
Guides
Changing the light bulb
Instructions from the manualReplace the light bulb3 steps
- Unplug the machine and let the bulb cool.
- Loosen the cover screw, remove the cover, remove the old bulb and fit a replacement of the original type.
- Refit the cover and tighten its screw; follow the original bulb rating.
Model details
Model and compatibility
- Needles
- The guide specifies SCHMETZ 130/705H, size 90/14. It also recommends the SUK ball-point variant for reducing material breakage. [1]
- Stitches
- Use three needles and four threads for 6 mm coverstitch, two needles and three threads for 6 or 3 mm coverstitch, or the center needle and looper for chain stitch. [1]
- Stitch length
- The documented stitch length is 2–4 mm. Differential feed and presser-foot pressure can be adjusted for the fabric. [1]