MODEL REFERENCE
Brother FAX-8360P
19 errors · 28 troubleshooting topics · 5 guides
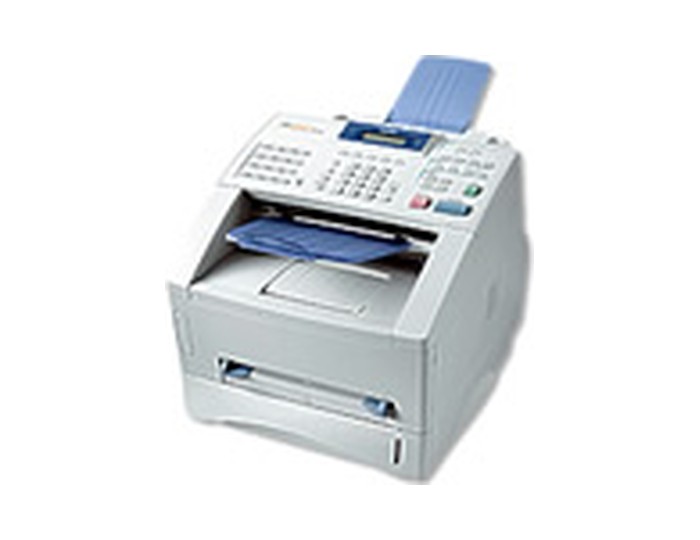
The checks and guides below come from the official manuals for this model.
No matches for this wording. Try a light name, error code or a shorter phrase.
Errors and messages
Shown on the machine display CHANGE DRUM SOONdrum life is nearly exhausted
Replace the drum if print quality has deteriorated. If you already fitted a new drum, open the front cover, press Clear and then 1 to reset its counter.
CHANGE TONERtoner is running low
Order the correct replacement toner now. Printing remains possible while the Toner Empty light flashes, but the cartridge is nearly depleted.
CHECK DOCUMENTdocument did not feed correctly
Open the control panel, carefully pull the document toward the front, close the panel and press Stop/Exit. Follow the document-jam procedure before pulling the sheet.
CHECK PAPERpaper missing or incorrectly loaded
Refill the tray or remove and reload its paper squarely. Check the guides and reduce an overfilled stack.
CHECK PAPER #1paper missing or incorrectly loaded in tray 1
Reload paper in the indicated tray and set its guides to fit.
CHECK PAPER #2paper missing or incorrectly loaded in optional tray 2
Check and reload the optional second paper tray. This message applies when that tray is fitted.
CHECK PAPER SIZEpaper size is wrong for receiving faxes
Load A4 paper in the tray for fax reception.
COMM.ERRORtelephone-line communication failed
Call again. If line noise continues, ask the telephone provider to check the line.
CONNECTION FAILpolled fax is not waiting for polling
Ask the other party to verify that its fax is set to Polled Waiting.
COOLING DOWNdrum or toner is too hot
Wait while the cooling fan runs. The machine resumes printing when its temperature is ready.
COVER OPENfront cover is not fully closed
Open the front cover and close it completely.
DISCONNECTEDother party ended the call
Send again, or call the other party to check why the connection ended.
MACHINE ERROR XXmechanical fault
Unplug the fax machine and contact a Brother dealer for service.
NO RESPONSE/BUSYdestination is busy or does not answer
Check that the number is correct and belongs to a fax, then call again.
NOT ASSIGNEDdial shortcut is not programmed
Store the destination in the One Touch or Speed Dial location before using it.
OUT OF MEMORYmemory capacity is exceeded
- If memory fills on the first copy page, press Stop/Exit and retry as a single copy.
- On later pages, press Copy to print those already scanned or Stop/Exit to cancel.
- During fax scanning, stop and resend later, or press Fax Start to send the pages already scanned.
- Clear stored faxes only after checking they are no longer needed.
PAPER JAMrecording paper is jammed
- Locate the jam before removing paper.
- Clear the tray, drum path or rear fuser path using the matching procedure; protect hot internal parts and pull gently to avoid tearing the sheet.
PLS OPEN COVERpaper or another object is trapped inside
- Open the front cover and remove the drum assembly.
- Gently remove trapped paper or another visible object, refit the assembly and close the cover.
- If the message remains, reopen and close the cover once more.
- Contact Brother if MACHINE ERROR XX appears.
TONER EMPTYtoner is exhausted or not installed
Install the toner cartridge correctly in the drum, or fit a new compatible cartridge.
Troubleshooting
Find the problem you are experiencingReceived fax is compressed, streaked or cut offView
Make a copy to check whether the fault is also present locally. Static or interference on the phone line can cause it. If the copy is also poor, contact a Brother dealer.
Received faxes have vertical black linesView
Clean the primary corona wire. Ask the sender to make a copy to check its scanner, and try receiving from another fax. Contact Brother if the streaks persist.
Voice callers trigger fax receptionView
Press Stop/Exit to stop mistaken fax reception. Turn Fax Detect off if voices or music keep triggering it on an external telephone.
Dialling does not workView
Check dial tone, Tone/Pulse mode, telephone-line connections and power. Try a manual fax from the external handset, and press Fax Start only after receiving tones begin.
Fax does not answer incoming calls3 steps
- Choose the receiving mode that matches your setup: Fax, Fax/Tel or TAD.
- Check dial tone and call the machine to test its response.
- Check the line cord, and ask the telephone provider if the line does not ring.
External handset has no dial tone2 steps
- Check its connection to the fax and both ends of the telephone-line cord.
- Test the wall socket with another single-line phone, and contact the provider if that socket has no dial tone.
Transmitted fax quality is poorView
Try Fine or Superfine resolution and make a copy to check local scanner operation.
Transmission report shows Results:NGView
Send the fax again after temporary line noise clears. Ask the telephone provider to check the line if failures continue.
Recipient says the fax is unclearView
Try Fine or Superfine resolution. Check and clean marks from the scanner glass.
Recipient sees vertical streaksView
Clean the scanner and make a local copy to identify whether the streaks start at this machine or the receiving fax.
Fax/Tel mode gives a pseudo-ringView
Answer the external handset and press Tel, or answer an extension and enter the deactivation code, normally #51.
Transfer a fax answered on the telephoneView
At the machine, press Fax Start and hang up. From an extension phone, enter the remote activation code, normally *51, and hang up when the fax answers.
Paper will not loadView
Load paper if the tray is empty. Straighten curled sheets, square the stack, try turning it over and reduce excess paper before retrying.
Clear a recording-paper jamView
Find the jam in the tray, drum path or fuser path. Use the matching jam procedure, avoid the hot parts shown in the manual and gently pull the sheet without tearing it.
Copies have vertical streaksView
Clean the scanner and the drum’s primary corona wire.
Printouts are too dark or lightView
Adjust Print Density from its middle setting to suit the result.
Printouts have white stripes or faint areasView
Wipe the laser scanner window with a clean soft cloth. Replace the drum if white stripes persist and CHANGE DRUM SOON appears.
Printouts have toner stains or vertical dark stripesView
Clean the interior and corona wire, and return its tab to Home. Replace the drum if dark stripes persist with CHANGE DRUM SOON.
Black text or graphics have white spots2 steps
- Use paper within the guide’s specifications, avoiding rough or unsuitable thick media.
- Replace the drum if spots persist with CHANGE DRUM SOON; check Paper Type if copies are affected.
Toner scatters across the pageView
Adjust Print Density, clean the interior and drum, and use suitable paper. Replace the drum if scattering persists with CHANGE DRUM SOON.
Entire page prints blackView
Clean the interior and corona wire and avoid heat-sensitive paper. Replace the drum if pages remain black or CHANGE DRUM SOON appears.
Page prints blankView
Check whether the toner cartridge is empty and replace it if needed.
Printouts have repeating marksView
Try several copy pages to see whether marks clear after prolonged disuse. Replace a drum whose surface is marked or damaged by excessive light exposure.
Printouts blur at the center or edges3 steps
- Check room heat and humidity and place the fax on a flat surface.
- Gently rock the drum and toner assembly side to side.
- Wipe the scanner window with a clean soft cloth; replace the drum if blurring persists with CHANGE DRUM SOON.
Printouts have ghost imagesView
Adjust Print Density and use paper within the specifications. Rough or unsuitable thick media can cause ghosting.
Clear an original-document jamView
Open the control panel and carefully pull the trapped original toward the front. Close the panel and press Stop/Exit.
Clear tray, drum-path and fuser jams6 steps
- Locate the jam first.
- For tray jams, remove the tray and wrinkled sheets, align the guides and reload flat.
- For drum-path jams, open the front, remove the drum assembly and pull out the paper gently.
- For rear fuser jams, open the rear and remove the sheet without tearing it.
- Refit removed parts and close covers.
- Avoid the hot internal areas shown in the manual.
Program One Touch and Speed DialView
Store the telephone or fax number in the selected One Touch key or Speed Dial location, then add a name if required. Check stored numbers before using automatic dialling.
Guides
Cleaning the scanner
Instructions from the manualClean scanner and print system4 steps
- Unplug the telephone line before the power cord for scanner cleaning.
- Open the control panel, wipe the white bar and glass with a lint-free soft cloth lightly moistened with isopropyl alcohol, then close it.
- Keep alcohol away from the control panel, laser window and toner sensor.
- For the laser window use a clean soft dry cloth; avoid hot internal parts and touching the window.
Cleaning the drum unit
Instructions from the manualClean the drum’s corona wire2 steps
- Remove the drum assembly and slide its corona-wire tab right to left several times.
- Return it to Home before reinstalling the assembly and closing the front cover; leaving it displaced can produce vertical stripes.
Replacing the toner cartridge
Instructions from the manualReplace toner and drum6 steps
- Use the compatible regional toner and drum.
- Remove the drum and toner assembly, release the cartridge and fit its replacement securely.
- Clean and home the corona-wire tab before reinstalling.
- After installing a new drum, leave the front cover open, press Clear, then 1, and close the cover when ACCEPTED appears.
- Avoid the hot internal parts illustrated in the manual.
- Keep replacement parts covered from light and follow the disposal instructions.
Receiving a fax
Instructions from the manualSet receive mode and fax detection3 steps
- Use Fax for dedicated fax calls, Fax/Tel when sharing voice and fax, or TAD for an external answering device.
- Adjust Fax Detect if it mistakenly answers voice calls.
- With Fax/Tel, its pseudo-ring means you must answer the voice call.
Setting the print density
Instructions from the manualAdjust received-fax print densityView
Open Menu, 2, 1, 7, change density with the arrow keys, then confirm with Set and exit with Stop/Exit.
Model details
Model and compatibility
- Regional supplies
- This UK guide specifies TN-6300 standard-yield or TN-6600 high-yield toner and the DR-6000 drum. [1]
- Drum
- The DR-6000 drum is separate from the toner. Reset its counter only after fitting a new drum. [1]
- Print density
- Use Menu, 2, 1, 7 to adjust print density for received faxes and copies. [1]