MODEL REFERENCE
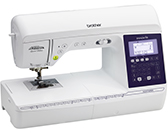
Brother Innov-is NQ575PRW / Innov-is NQ575
12 errors · 31 troubleshooting topics
The checks and guides below come from the official manuals for this model.
No matches for this wording. Try a light name, error code or a shorter phrase.
Error codes
Shown on the machine display E01e01: Presser foot raised
Lower the presser foot before continuing.
E02e02: Buttonhole lever lowered for another stitch
Raise the buttonhole lever before using the selected ordinary stitch.
E03e03: Buttonhole lever raised for buttonhole stitch
Lower the buttonhole lever before sewing a buttonhole.
E04e04: Bobbin-winder shaft engaged
Slide the bobbin-winder shaft left before continuing.
E05e05: Foot controller connected
Disconnect the foot controller to use Start/Stop, or operate the machine with the controller.
E06e06: Motor locked by tangled thread or bent needle5 checks
E07e07: No stitch pattern selected
Select a stitch pattern before using Start/Stop.
E08e08: Width Control prevents Start/Stop
Turn Width Control off in settings before pressing Start/Stop, or use the foot controller.
E09e09: Twin-needle mode conflicts with stitch
Switch to single-needle mode and fit a single needle for the selected stitch.
E10e10: Needle plate does not match straight stitch
Switch the machine off, fit the needle plate appropriate for the selected straight stitch, then restart.
E11e11: Needle-plate cover removed
Switch off the machine and secure the needle-plate cover before restarting.
F**f**: Possible machine malfunction
Stop using the machine and contact an authorized Brother service center.
Troubleshooting
Find the problem you are experiencingCannot thread the needle7 checks
- Needle is not in the correct position.
- Raise the needle using the needle-position button.
- Needle is installed incorrectly.
- Remove and install the needle correctly.
- Needle is turned, bent or the point is dull.
- Replace the needle.
- Upper threading is incorrect.
- Follow the threading steps and rethread the machine.
- The needle threader hook is bent and does not pass through the eye of the needle.
- Contact an authorized Brother dealer or service center for repair or controller replacement.
- The needle threader lever cannot be moved or returned to its original position.
- Contact an authorized Brother dealer or service center for repair or controller replacement.
- A size 65/9 needle is being used.
- Thread a size 65/9 needle by hand because the needle threader cannot be used with it.
Bobbin thread does not wind neatly on the bobbin4 checks
- The thread is not passed through the bobbin winding thread guide correctly.
- Route the thread through the bobbin-winding guide correctly.
- Bobbin spins slowly.
- Move the sewing-speed slider right to increase bobbin-winding speed.
- The thread that was pulled out was not wound onto the bobbin correctly.
- Wrap the thread around the bobbin five or six times clockwise before winding.
- The empty bobbin was not set on the pin properly.
- Seat the empty bobbin on the pin and turn it until it clicks.
While winding the bobbin, the bobbin thread was wound below the bobbin winder seat1 check
- You have not wound the bobbin thread properly. While initially winding thread on the bobbin the bobbin thread is not properly inserted into the guides.
- Remove thread caught under the winder seat, then use the machine diagrams to thread and wind the bobbin again.
The bobbin thread cannot be pulled up2 checks
- Needle is turned, bent or the point is dull.
- Replace the needle.
- Bobbin is set incorrectly.
- Remove and seat the bobbin correctly.
Nothing appears in the LCD2 checks
- Main power switch is not turned on.
- Switch the machine power on.
- The plug of the power cord is not inserted into an electrical outlet.
- Plug the power cord into an electrical outlet.
The LCD screen is fogged up1 check
- Condensation has formed on the LCD screen.
- Allow the screen to clear as the condensation evaporates.
The operation keys do not respond1 check
- A glove is worn when the keys are pressed. The keys are pressed with a fingernail. A non-electrostatic touch pen is being used.
- Use a fingertip on the touch keys or a pen compatible with capacitive screens.
The operation keys do not respond, or the sensitivity is too strong1 check
- The sensitivity of the operation keys is not set for the user.
- Adjust the touch-key sensitivity in the machine settings.
The sewing light does not come on1 check
- The sewing light is damaged.
- Contact an authorized Brother dealer or service center for repair or controller replacement.
Machine does not operate6 checks
- “Start/Stop” button was not pressed.
- Press Start/Stop to begin sewing.
- The bobbin winder shaft is pushed to the right.
- Shift the bobbin winder shaft left.
- There is no pattern selected.
- Select an embroidery pattern before starting.
- Presser foot is not lowered.
- Lower the presser foot before starting.
- “Start/Stop” button was pushed with the foot controller attached.
- Unplug the foot controller before using Start/Stop, or operate the machine with the controller.
- The “Start/Stop” button was pressed while the machine is set for the sewing speed controller to control the zigzag stitch width.
- Use the foot controller, or turn Width Control off before pressing Start/Stop.
Needle breaks21 checks
- Needle is installed incorrectly.
- Remove and install the needle correctly.
- Needle clamp screw is not tightened.
- Tighten the needle clamp screw securely.
- Needle is turned or bent.
- Replace the needle.
- Using improper needle or thread for the selected fabric.
- Choose a needle and thread combination suited to the fabric using the manual chart.
- Wrong presser foot was used.
- Fit the presser foot recommended for the selected stitch.
- Upper thread tension is too tight.
- Adjust the thread-tension setting.
- Fabric is pulled during sewing.
- Guide the fabric without pulling it.
- Spool cap is set incorrectly.
- Check the spool-cap instructions and fit the cap correctly.
- There are scratches around the opening in the needle plate. * There is a notch on the left side of the opening in the needle plate. This is not a scratch. a 1 Notch
- Have the scratched needle plate replaced by an authorized Brother dealer.
- There are scratches around the opening in the presser foot.
- Replace the scratched presser foot or ask an authorized Brother dealer to inspect it.
- There are scratches on the bobbin case.
- Replace the scratched bobbin case or ask an authorized Brother dealer to inspect it.
- Needle is defective.
- Replace the needle.
- A bobbin designed specifically for this machine is not used.
- Fit a bobbin specified for this Brother model.
- Upper threading is incorrect.
- Follow the threading steps and rethread the machine.
- Bobbin is set incorrectly.
- Reset the bobbin thread correctly.
- Presser foot is attached incorrectly.
- Attach the presser foot correctly.
- Screw of the presser foot holder is loose.
- Tighten the presser-foot holder screw securely.
- Fabric is too thick.
- Use fabric the needle can pierce when the handwheel is turned.
- Fabric is fed forcefully when sewing thick fabric or thick seams.
- Let the feed dogs move thick fabric without forcing it.
- Stitch length is too short.
- Adjust the stitch length for the fabric.
- Bobbin thread is incorrectly wound.
- Replace it with a bobbin wound correctly.
Upper thread breaks13 checks
- Machine is not threaded correctly (used the wrong spool cap, spool cap is loose, the thread did not catch the needle bar threader, etc.).
- Rethread the machine from the spool through the needle.
- Knotted or tangled thread is being used.
- Remove the knots or tangles.
- The selected needle is not appropriate for the thread being used.
- Fit a needle suitable for the thread in use.
- Upper thread tension is too tight.
- Adjust the thread tension.
- Thread is tangled.
- Cut and remove tangled thread from the race.
- Needle is turned, bent or the point is dull.
- Replace the needle.
- Needle is installed incorrectly.
- Remove and install the needle correctly.
- There are scratches around the opening in the needle plate. * There is a notch on the left side of the opening in the needle plate. This is not a scratch. a 1 Notch
- Have the scratched needle plate replaced by an authorized Brother dealer.
- There are scratches around the opening in the presser foot.
- Replace the scratched presser foot or ask an authorized Brother dealer to inspect it.
- There are scratches on the bobbin case.
- Replace the scratched bobbin case or ask an authorized Brother dealer to inspect it.
- Using improper needle or thread for the selected fabric.
- Choose a needle and thread combination suited to the fabric using the manual chart.
- While sewing, the thread became knotted or tangled.
- Rethread both the upper and bobbin threads.
- A bobbin designed specifically for this machine is not used.
- Fit a bobbin specified for this Brother model.
The thread is tangled on the wrong side of the fabric2 checks
- Upper threading is incorrect.
- Raise the presser foot and rethread the upper thread so it seats in the tension mechanism.
- Using improper needle or thread for the selected fabric.
- Choose a needle and thread combination suited to the fabric using the manual chart.
The upper thread is too tight1 check
- The bobbin thread is incorrectly installed.
- Refit the bobbin thread correctly.
Bobbin thread breaks5 checks
- Bobbin is set incorrectly.
- Remove and seat the bobbin correctly.
- Bobbin thread is incorrectly wound.
- Replace it with a bobbin wound correctly.
- There are scratches on the bobbin or it doesn’t rotate properly.
- Replace the bobbin.
- Thread is tangled.
- Cut and remove tangled thread from the race.
- A bobbin designed specifically for this machine is not used.
- Fit a bobbin specified for this Brother model.
Fabric puckers7 checks
- There is a mistake in the upper or bobbin threading.
- Follow the threading steps and rethread the machine correctly.
- Spool cap is set incorrectly.
- Check the spool-cap instructions and fit the cap correctly.
- Using improper needle or thread for the selected fabric.
- Choose a needle and thread combination suited to the fabric using the manual chart.
- Needle is turned, bent or the point is dull.
- Replace the needle.
- Stitches are too long when sewing thin fabrics.
- Shorten the stitch length.
- Thread tension is set incorrectly.
- Adjust the thread tension.
- Wrong presser foot.
- Fit the presser foot suited to the selected stitch.
Skipped stitches7 checks
- Machine is threaded incorrectly.
- Follow the threading steps and rethread the machine correctly.
- Using improper needle or thread for the selected fabric.
- Choose a needle and thread combination suited to the fabric using the manual chart.
- Needle is turned, bent or the point is dull.
- Replace the needle.
- Needle is installed incorrectly.
- Remove and install the needle correctly.
- The needle is worn/damaged.
- Replace the needle.
- Dust or lint has collected under the needle plate.
- Brush lint from beneath the needle plate.
- Thin or stretch fabrics are being sewn.
- Place one sheet of thin paper beneath thin or stretch fabric while sewing.
No stitching3 checks
- Needle is turned, bent or the point is dull.
- Replace the needle.
- Bobbin is set incorrectly.
- Reset the bobbin thread correctly.
- Upper threading is incorrect.
- Follow the threading steps and rethread the machine.
High-pitched sound while sewing5 checks
- Dust or lint is caught in the feed dogs.
- Remove lint from the feed dogs.
- Pieces of thread are caught in the race.
- Clean lint from the bobbin race.
- Upper threading is incorrect.
- Follow the threading steps and rethread the machine.
- A bobbin designed specifically for this machine is not used.
- Fit a bobbin specified for this Brother model.
- There are needle holes or friction scratches in the bobbin case.
- Replace the scratched bobbin case or ask an authorized Brother dealer to inspect it.
Fabric does not feed through the machine7 checks
- Feed dogs are set in the down position.
- Slide the feed-dog position switch right to raise the feed dogs.
- Stitches are too close together.
- Increase the stitch length.
- Wrong presser foot was used.
- Fit the presser foot suited to the selected stitch.
- Needle is turned, bent or the point is dull.
- Replace the needle.
- Thread is entangled.
- Cut and remove thread tangled in the race.
- Zigzag foot “J” is slanted on a thick seam at the beginning of stitching.
- Keep zigzag foot “J” level while sewing by using its locking pin, the black button on the left side.
- Presser foot pressure is set incorrectly for fabric.
- Set presser-foot pressure for the fabric with the pressure dial.
The fabric feeds in the opposite direction1 check
- The feed mechanism is damaged.
- Contact an authorized Brother dealer or service center for repair or controller replacement.
The needle contacts the needle plate2 checks
- The needle clamp screw is loose.
- Tighten the needle clamp screw and replace a bent or blunt needle.
- Needle is turned, bent or the point is dull.
- Replace the needle.
Fabric being sewn with the machine cannot be removed1 check
- Thread is tangled below the needle plate.
- Lift the fabric, cut the threads beneath it, and clean the race.
A broken needle has fallen into the machine1 check
- –
- Switch off the machine and remove the needle plate.
- If visible, lift out the fallen needle with tweezers.
- Refit the plate, install a new needle, and turn the handwheel by hand to check smooth movement and needle alignment before powering on.
- If the needle cannot be removed or the handwheel binds, contact authorized Brother service.
The handwheel feels sluggish when it is turned1 check
- Thread is tangled in the bobbin case.
- Clear thread from the bobbin case and reinstall the case in the correct position.
The stitch is not sewn correctly4 checks
- The presser foot that is used is not appropriate for the type of stitch that you wish to sew.
- Fit the presser foot specified for the selected stitch.
- The thread tension is incorrect.
- Adjust the upper thread tension.
- The thread is tangled, for example, in the bobbin case.
- Clear the thread tangle and clean the race if the bobbin case is involved.
- Feed dogs are set in the down position.
- Slide the feed-dog position switch right to raise the feed dogs.
Thread tension is incorrect8 checks
- Upper threading is incorrect.
- Follow the threading steps and rethread the machine.
- Bobbin is set incorrectly.
- Reseat the bobbin. If the needle plate was removed, secure it before installing the bobbin case and check that the needle enters the center opening.
- Using improper needle or thread for the selected fabric.
- Choose a needle and thread combination suited to the fabric using the manual chart.
- Presser foot holder is not attached correctly.
- Refit the presser-foot holder correctly.
- Thread tension is set incorrectly.
- Adjust the thread tension.
- Bobbin thread is incorrectly wound.
- Replace it with a bobbin wound correctly.
- Needle is turned, bent or the point is dull.
- Replace the needle.
- A bobbin designed specifically for this machine is not used.
- Fit a bobbin specified for this Brother model.
Character or decorative patterns are misaligned1 check
- Pattern adjustment settings were set incorrectly.
- Correct the pattern-adjustment settings to align the design.
Pattern does not turn out5 checks
- Wrong presser foot was used.
- Fit the presser foot specified for the pattern.
- Did not use a stabilizer material on thin fabrics or stretch fabrics.
- Place stabilizer beneath thin or stretch fabric.
- Thread tension is set incorrectly.
- Adjust the thread tension.
- Fabric was pulled, pushed or fed at an angle while it was being sewn.
- Guide the fabric with both hands so it feeds straight.
- The thread is tangled, for example, in the bobbin case.
- Clear the thread tangle and clean the race if the bobbin case is involved.
Two or four beeps after an incorrect operation1 check
- The machine rejected the last operation.
- Follow the LCD advice and correct the operation.
Four-second beep and machine stops1 check
- The machine locked, possibly on tangled thread.
- Check and clear the cause before restarting.