MODEL REFERENCE
Brother SE600
27 errors · 33 troubleshooting topics
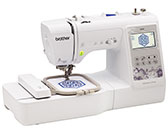
The checks and guides below come from the official manuals for this model.
No matches for this wording. Try a light name, error code or a shorter phrase.
Errors and messages
Shown on the machine display —A malfunction occurred. Turn the machine off, then on again
Turn the machine off and on once; if the message returns, contact authorized Brother service.
—Cannot change the configuration of the characters
Reduce the number of characters in the curved layout.
—Cannot change the font since some letters are not included to the selected font
Choose a font that contains every letter used in the pattern.
—Cannot recognize the data for the selected pattern. The data may be corrupted. Please turn off the power and turn on again
Check the pattern file for corruption or incompatible design data, then restart the machine.
—Check and rethread the upper thread
Stop and rethread the broken or misplaced upper thread.
—Data volume is too large for this pattern
Reduce the number or size of patterns being edited to fit memory.
—Lower the presser foot lever
Lower the presser foot before operating the machine.
—No more patterns can be added to this combination
Use 70 or fewer decorative stitches in the combination.
—Not enough available memory to save
Free storage by deleting an unneeded saved stitch or pattern.
—Not enough available memory to save the pattern. Delete another pattern?
Delete an older saved item to make room, or cancel without saving.
—OK to recall and resume previous memory?
Choose to resume the saved embroidery position, then align the needle before continuing.
—Pattern extends to the outside of embroidery frame
Choose a larger compatible frame or a smaller pattern.
—Pattern extends to the outside of embroidery frame. Add no additional characters
Reduce or rearrange the characters, or select a larger compatible frame.
—Pattern extends to the outside of embroidery frame. This function cannot be used at this time
Use a smaller character pattern or change the layout to fit the selected frame.
—Preventive maintenance is recommended
Arrange a regular maintenance check with authorized Brother service.
—The bobbin thread is almost empty
Replace the nearly empty bobbin with a wound bobbin; cut and remove the embroidery frame first if embroidering.
—The bobbin winder safety device has activated. Is the thread tangled?
Stop the winder and clear tangled thread before trying again.
—The carriage of the embroidery unit will move. Keep your hands etc. away from the carriage
Keep hands and objects outside the carriage travel area.
—The safety device has been activated. Is the thread tangled? Is the needle bent?
Stop and clear tangled thread, then inspect the needle and thread delivery path.
—This pattern cannot be used
Choose a pattern supported by this model.
—This USB media cannot be used
Use compatible USB media.
—USB media is not loaded. Load USB media
Insert a USB flash drive before recalling or saving a pattern.
F**f**: possible machine malfunction
Contact authorized Brother service about the F** malfunction display.
Troubleshooting
Find the problem you are experiencingThe LCD screen is fogged up1 check
- Condensation has formed on the LCD screen
- Allow the screen to clear as the condensation evaporates.
The operation keys do not respond, or the key response is too sensitive1 check
- A glove is worn when the keys are pressed. The keys are pressed with a fingernail. A non-electrostatic touch pen is being used. The sensitivity of the operation keys is not set for the user
- Use a bare fingertip or electrostatic touch pen and adjust key sensitivity in settings.
The sewing light does not come on1 check
- [Light] is set to [OFF] in the settings screen
- Turn the sewing light on in the settings screen.
Embroidery unit does not operate1 check
- Embroidery unit is not attached correctly
- Remove and reattach the embroidery unit correctly.
Cannot thread the needle7 checks
- Needle is not in the correct position
- Raise the needle using the needle-position button.
- Needle is installed incorrectly
- Reinstall the needle securely.
- Needle is turned, bent or the point is dull
- Replace a bent, turned or dull needle.
- Upper threading is incorrect. The needle threader lever is not lowered until it clicks
- Rethread the upper path and lower the threader lever until it clicks.
- The needle threader hook is bent and does not pass through the eye of the needle
- Have an authorized Brother service center inspect the bent threader hook.
- The needle threader lever cannot be moved or returned to its original position
- Have an authorized Brother service center inspect the stuck threader lever.
- A size 65/9 needle is being used
- Thread a size 65/9 needle by hand; this threader does not fit that needle.
Bobbin thread does not wind neatly on the bobbin3 checks
- The thread is not passed through the bobbin winding thread guide correctly
- Pass the thread through the bobbin-winding guide as shown in the manual.
- The thread that was pulled out from the bobbin- winding thread guide was incorrectly wound onto the bobbin
- Wind the free thread around the bobbin correctly before starting the winder.
- The empty bobbin was not set on the pin properly
- Seat the empty bobbin fully on its winding pin.
While winding the bobbin, the bobbin thread was wound below the bobbin winder seat1 check
- The thread was incorrectly passed under the pretension disk on the bobbin-winding thread guide
- Remove trapped thread, route the thread beneath the pretension disk, then wind again.
The bobbin thread cannot be pulled up2 checks
- Needle is turned, bent or the point is dull
- Replace a bent, turned or dull needle.
- Bobbin is set incorrectly
- Remove and reinstall the bobbin in the correct direction.
Nothing appears in the LCD2 checks
- Main power switch is not turned on
- Turn on the main power switch.
- The plug of the power cord is not inserted into an electrical outlet
- Plug the power cord into the outlet.
Machine does not operate6 checks
- “Start/Stop” button was not pressed
- Press Start/Stop to begin the selected stitch.
- The bobbin winder shaft is pushed to the right
- Slide the bobbin-winder shaft back to the left.
- There is no stitch selected
- Select a stitch before pressing Start/Stop.
- Presser foot is not lowered
- Lower the presser foot.
- “Start/Stop” button was pressed with the foot controller attached
- Disconnect the foot controller before using Start/Stop, or use the connected controller.
- The “Start/Stop” button was pressed while the machine is set for the sewing speed controller to control the zigzag stitch width
- Turn width control off in settings or use the foot controller.
Needle breaks21 checks
- Needle is installed incorrectly
- Reinstall the needle securely.
- Needle clamp screw is not tightened
- Tighten the needle clamp screw.
- Needle is turned or bent
- Fit a straight, undamaged needle.
- Using improper needle or thread for the selected fabric
- Use needle and thread sizes suitable for the selected fabric.
- Wrong presser foot was used
- Attach the presser foot specified for the stitch.
- Upper thread tension is too tight
- Reduce the upper thread tension.
- Fabric is pulled during sewing
- Guide the fabric gently without pulling it.
- Spool of thread is set incorrectly
- Seat the spool correctly.
- There are scratches around the opening in the needle plate
- Check for a true burr, excluding the normal notch; ask Brother service about a damaged needle plate.
- There are scratches around the opening in the presser foot
- Have an authorized Brother service center replace the scratched presser foot.
- There are scratches on the bobbin case
- Have an authorized Brother service center replace the scratched bobbin case.
- A bobbin designed specifically for this machine is not used
- Use a bobbin made for this model.
- Upper threading is incorrect
- Rethread the upper thread along the manual path.
- Bobbin is set incorrectly
- Remove and reinstall the bobbin in the correct direction.
- Presser foot is attached incorrectly
- Reattach the presser foot correctly.
- Screw of the presser foot holder is loose
- Tighten the presser foot holder screw.
- Fabric is too thick
- Use the correct needle, foot and fabric handling for thick material.
- Fabric is fed forcefully when sewing thick fabric or thick seams
- Guide thick fabric gently; do not force it under the foot.
- Stitch length is too short
- Increase the stitch length.
- Stabilizer is not attached to fabric being embroidered
- Attach stabilizer to the fabric before embroidering.
- Bobbin thread is incorrectly wound
- Wind the bobbin again with the thread correctly placed.
Upper thread breaks12 checks
- Machine is not threaded correctly (used the wrong spool cap, spool cap is loose, the thread did not catch the needle bar threader, etc.)
- Rethread with the right spool cap and guide path.
- Knotted or tangled thread is being used
- Discard the knotted thread and use smooth thread.
- The selected needle is not appropriate for the thread being used
- Choose a needle matched to the thread.
- Upper thread tension is too tight
- Reduce the upper thread tension.
- Thread is tangled
- Stop, remove tangled thread and clean the bobbin area if needed.
- Needle is turned, bent or the point is dull
- Replace a bent, turned or dull needle.
- Needle is installed incorrectly
- Reinstall the needle securely.
- There are scratches around the opening of the needle plate
- Check for a true burr, excluding the normal notch; ask Brother service about a damaged needle plate.
- There are scratches around the opening in the presser foot
- Have an authorized Brother service center replace the scratched presser foot.
- There are scratches on the bobbin case
- Have an authorized Brother service center replace the scratched bobbin case.
- Using improper needle or thread for the selected fabric
- Use needle and thread sizes suitable for the selected fabric.
- A bobbin designed specifically for this machine is not used
- Use a bobbin made for this model.
The thread is tangled on the wrong side of the fabric2 checks
- Upper threading is incorrect
- Rethread the upper thread along the manual path.
- Using improper needle or thread for the selected fabric
- Use needle and thread sizes suitable for the selected fabric.
The upper thread is too tight1 check
- The bobbin thread is incorrectly installed
- Reinstall the bobbin thread correctly.
Bobbin thread breaks5 checks
- Bobbin is set incorrectly
- Remove and reinstall the bobbin in the correct direction.
- Bobbin thread is incorrectly wound
- Wind the bobbin again with the thread correctly placed.
- A scratched bobbin is being used
- Replace the scratched bobbin.
- Thread is tangled
- Stop, remove tangled thread and clean the bobbin area if needed.
- A bobbin designed specifically for this machine is not used
- Use a bobbin made for this model.
Fabric puckers7 checks
- There is a mistake in the upper or bobbin threading
- Rethread both the upper and bobbin paths.
- Spool of thread is set incorrectly
- Seat the spool correctly.
- Using improper needle or thread for the selected fabric
- Use needle and thread sizes suitable for the selected fabric.
- Needle is turned, bent or the point is dull
- Replace a bent, turned or dull needle.
- Stitches are too long when sewing thin fabrics
- Shorten the stitch length for thin fabric.
- Thread tension is set incorrectly
- Adjust upper thread tension for the fabric and stitch.
- Wrong presser foot was used
- Attach the presser foot specified for the stitch.
The stitch is not sewn correctly4 checks
- The presser foot that is used is not appropriate for the type of stitch that you wish to sew
- Fit the presser foot specified for this stitch.
- The thread tension is incorrect
- Adjust the upper thread tension.
- The thread is tangled, for example, in the bobbin case
- Remove the thread tangle and clean the bobbin race.
- Feed dogs are set in the down position
- Raise the feed dogs with the feed-dog switch on the right.
Skipped stitches6 checks
- Machine is threaded incorrectly
- Rethread the machine following the upper and lower paths.
- Using improper needle or thread for the selected fabric
- Use needle and thread sizes suitable for the selected fabric.
- Needle is turned, bent or the point is dull
- Replace a bent, turned or dull needle.
- Needle is installed incorrectly
- Reinstall the needle securely.
- Dust or lint has collected under the needle plate
- With the machine off, clean lint from beneath the needle plate.
- Thin or stretch fabrics are being sewn
- Use stabilizer behind thin or stretch fabric.
Not stitching3 checks
- Needle is turned, bent or the point is dull
- Replace a bent, turned or dull needle.
- Bobbin is set incorrectly
- Remove and reinstall the bobbin in the correct direction.
- Upper threading is incorrect
- Rethread the upper thread along the manual path.
High-pitched sound while sewing5 checks
- Dust or lint is caught in the feed dogs
- Clean lint from the feed dogs.
- Pieces of thread are caught in the race
- With the machine off, remove thread scraps from the bobbin race.
- Upper threading is incorrect
- Rethread the upper thread along the manual path.
- A bobbin designed specifically for this machine is not used
- Use a bobbin made for this model.
- There are needle holes or friction scratches in the bobbin case
- Have Brother service inspect the rough bobbin case.
Fabric does not feed through the machine6 checks
- Feed dogs are set in the down position
- Raise the feed dogs with the feed-dog switch on the right.
- Stitches are too close together
- Lengthen the stitch.
- Wrong presser foot was used
- Attach the presser foot specified for the stitch.
- Needle is turned, bent or the point is dull
- Replace a bent, turned or dull needle.
- Thread is entangled
- Stop and remove entangled thread from the bobbin area.
- Zigzag foot “J” is slanted on a thick seam at the beginning of stitching
- Level zigzag foot J over the thick seam using the manual procedure.
The fabric feeds in the opposite direction1 check
- The feed mechanism is damaged
- Contact an authorized Brother service center about the damaged feed mechanism.
The needle contacts the needle plate2 checks
- The needle clamp screw is loose
- Tighten the needle clamp screw.
- Needle is turned, bent or the point is dull
- Replace a bent, turned or dull needle.
Fabric being sewn with the machine cannot be removed1 check
- Thread is tangled below the needle plate
- Turn the machine off, then clear thread tangled beneath the needle plate.
A broken needle has fallen into the machine1 check
- A broken needle is inside the machine.
- Turn the power off, remove the plate and retrieve the broken needle if visible. Fit a new needle and check the handwheel; seek Brother service if it still catches.
The handwheel does not turn smoothly1 check
- Thread is tangled in the bobbin case
- Turn the power off and clear thread tangled in the bobbin case.
Thread tension is incorrect8 checks
- Upper threading is incorrect
- Rethread the upper thread along the manual path.
- Bobbin is set incorrectly
- Remove and reinstall the bobbin in the correct direction.
- Using improper needle or thread for the selected fabric
- Use needle and thread sizes suitable for the selected fabric.
- Presser foot holder is not attached correctly
- Reattach the presser foot holder correctly.
- Thread tension is set incorrectly
- Adjust upper thread tension for the fabric and stitch.
- Bobbin thread is incorrectly wound
- Wind the bobbin again with the thread correctly placed.
- Needle is turned, bent or the point is dull
- Replace a bent, turned or dull needle.
- A bobbin designed specifically for this machine is not used
- Use a bobbin made for this model.
Decorative stitch patterns are misaligned2 checks
- Wrong presser foot was used
- Attach the presser foot specified for the stitch.
- Stitch pattern adjustment settings were set incorrectly
- Adjust the stitch-pattern alignment using the manual procedure.
Stitch pattern is irregular5 checks
- Wrong presser foot was used
- Attach the presser foot specified for the stitch.
- Thin or stretch fabrics are being sewn
- Use stabilizer behind thin or stretch fabric.
- Thread tension is set incorrectly
- Adjust upper thread tension for the fabric and stitch.
- Fabric was pulled, pushed or fed at an angle while it was being sewn
- Feed the fabric straight without pushing or pulling it.
- The thread is tangled, for example, in the bobbin case
- Remove the thread tangle and clean the bobbin race.
Embroidery pattern does not embroider correctly10 checks
- Thread is twisted
- Untwist the thread and rethread the embroidery path.
- Thread tension is set incorrectly
- Adjust upper thread tension for the fabric and stitch.
- Fabric was not inserted into the frame correctly (fabric was loose, etc.)
- Hoop the fabric tautly and evenly.
- Stabilizing material was not attached
- Attach suitable stabilizer before embroidering.
- There was an object placed near the machine, and the carriage or embroidery frame hit the object during embroidering
- Move objects clear of the carriage and embroidery frame travel.
- Material coming out of the embroidery frame is causing problems
- Rehoop fabric so it cannot snag, then reposition the pattern if needed.
- A heavy fabric is being embroidered, and the fabric is hanging off the table
- Support heavy fabric on the table while embroidering.
- Fabric is snagged or caught on something
- Stop and free fabric caught on the machine or frame.
- The carriage was moved while the embroidery frame was being removed or attached during embroidery
- Keep the carriage steady when fitting or removing the frame.
- Stabilizer is incorrectly attached, for example, it is smaller than the embroidery frame
- Use stabilizer at least as large as the embroidery frame.
Loops appear on the surface of the fabric when embroidering2 checks
- The thread tension is incorrectly set
- Adjust embroidery thread tension.
- Embroidery bobbin thread intended for use with this machine is not being used
- Use the embroidery bobbin thread specified for this machine.
Two or four beeps after an incorrect operation1 check
- The machine rejected the last operation.
- Follow the LCD message and correct the operation.
Four-second beep and machine stops1 check
- The machine locked, possibly on tangled thread.
- Check and clear the cause before restarting.