MODEL REFERENCE
TP-Link Archer C6 V4
7 errors · 12 troubleshooting topics · 2 guides
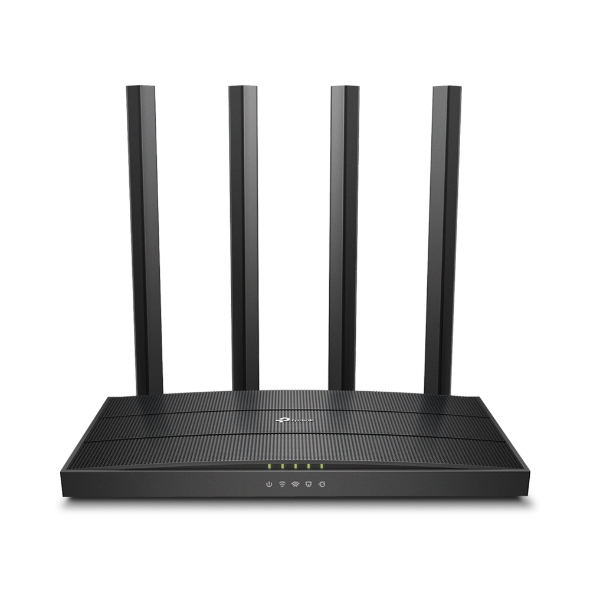
The checks and guides below come from the official manuals for this model.
No matches for this wording. Try a light name, error code or a shorter phrase.
Errors and indicators
Light patterns and messages documented in the manual Power flashingrouter is starting or updating
Wait for startup or firmware installation to finish. Do not disconnect power or switch the router off during the update.
Power offrouter has no power
Check the supplied power adapter and power connection, then use the router’s Power On/Off button.
2.4 GHz light off2.4 GHz Wi-Fi is disabled
If you need this band, enable it in Wireless settings or using the Wi-Fi/WPS button’s five-second wireless toggle. A disabled band is a setting, not a numeric fault code.
5 GHz light off5 GHz Wi-Fi is disabled
Enable the band in Wireless settings if required, or use the Wi-Fi/WPS button’s five-second wireless toggle.
Ethernet light offethernet device is not connected or powered
Check that the wired device is powered and its cable is seated in the correct Ethernet port.
Internet light orangewAN is connected but internet is unavailable
Open Advanced, Network, Status and check the WAN IP address. Follow the separate valid-IP or 0.0.0.0 troubleshooting branches below.
Internet light offwAN cable is unplugged
Connect the modem or upstream device to the router’s Internet port and check the physical cable connection.
Troubleshooting
Find the problem you are experiencingWi-Fi password is forgotten2 steps
- The factory password is on the router label.
- If changed, connect a computer by Ethernet, sign in at tplinkwifi.net with your TP-Link ID or local router password, and open Wireless to view or reset the wireless password.
Web-management password is forgotten3 steps
- For a TP-Link ID login, use Forgot password and complete the recovery steps.
- For an unrecoverable local password, hold Reset until the LEDs turn on, then create a new login at tplinkwifi.net.
- This reset requires internet and wireless reconfiguration, so record ISP settings first if available.
Router management page will not open6 steps
- Connect the computer to the router and check the corresponding link LED.
- Set its IP address and DNS to automatic, then enter tplinkwifi.net or the router’s LAN IP correctly.
- The manual’s factory LAN example is 192.168.0.1, but use your configured address if changed.
- For the Windows Internet Options workflow in the guide, choose Connections, Never dial a connection; under LAN Settings clear automatic detection, automatic configuration script and proxy-server options, then restore advanced settings.
- Try a different browser or computer.
- Factory reset is the final step and requires reconfiguration; contact TP-Link if login still fails.
Internet fails despite a valid WAN IP address5 steps
- Check Advanced, Network, Status.
- For a valid WAN address, the manual suggests trying 8.8.8.8 as Primary DNS under Advanced, Network, DHCP Server.
- Restart modem and router in this order: leave both off for one minute, start the modem and wait about two minutes for a steady connection light, then start the router and wait another one or two minutes.
- Check TCP/IP on a single affected device if others work.
- If needed, install the correct model and hardware-version firmware, then reset and reconfigure only as a last resort.
WAN IP address remains 0.0.0.06 steps
- Check the modem-to-Internet-port cable.
- If the ISP binds access to a computer MAC address, use the appropriate MAC Clone option under Internet or Advanced, Network, Internet; the computer’s wired and wireless MAC addresses differ.
- Check for a modem/router LAN-address conflict and, if needed, change the router LAN range under Advanced, Network, LAN; 192.168.2.1 is the manual’s example, not a required address.
- Restart modem and router with the one-minute off, modem-first sequence.
- Confirm connection type and credentials with the ISP and save them under Advanced, Network, Internet.
- Upgrade matching firmware if needed, and contact TP-Link if all checks fail.
Computer cannot find any wireless networks4 steps
- Enable the computer’s wireless adapter and check its driver.
- The guide’s historical Windows 7 example uses Troubleshoot for No connections are available.
- Its Windows XP example closes competing wireless utilities, then sets Wireless Zero Configuration to Automatic and starts that service through Computer Management, Services.
- Follow the equivalent adapter controls on your actual operating system.
Other networks appear but this router does not2 steps
- Check the wireless LED, move the device within range, and inspect the network name and Hide SSID setting under Wireless or Advanced, Wireless, Wireless Settings.
- Enable SSID broadcast if you want the name visible.
Wireless authentication or security key fails3 steps
- A WPS PIN request is different from the Wi-Fi password.
- If the PIN is unavailable or fails, choose the security-key connection option and enter the router’s wireless password.
- Check the configured password and letter case when Network Security Key Mismatch appears.
Wireless network is visible but will not connect3 steps
- Check signal strength and move closer.
- For 2.4 GHz interference, try channels 1, 6 or 11 as the manual suggests.
- Reinstall or update the computer’s wireless-adapter driver if needed.
Read normal LED states4 steps
- Steady Power means startup completed.
- The 2.4 GHz and 5 GHz lights show whether their bands are enabled.
- Ethernet lights indicate powered-on devices connected to their ports, and a green Internet light means internet service is available.
- Flashing Power during startup or firmware upgrade is normal; leave power connected.
Back up, restore or reset configuration5 steps
- Sign in and open Advanced, System Tools, Backup & Restore.
- BACK UP saves a .bin copy locally; BROWSE and RESTORE load that saved configuration.
- Wait during restoration without interrupting it.
- Resetting to defaults removes configuration and requires setup again.
- Keep the backup file private because it contains router settings.
Control wireless bands and use WPS4 steps
- Enable or disable a band through Wireless settings.
- Holding the Wi-Fi/WPS button for about five seconds toggles wireless.
- A short press starts WPS; use the other device’s WPS connection within two minutes.
- WPS is not available with WEP or on iOS devices according to this guide, so use the Wi-Fi password instead in those cases.
Guides
Log in to your router
Instructions from the manualConnect and configure the router4 steps
- Connect the modem to Internet and the computer to a LAN port, or join the Wi-Fi network printed on the router label.
- Open tplinkwifi.net and create the local password or sign in as the guide directs.
- Run Quick Setup, choose the connection type and parameters supplied by your ISP, and set wireless names and passwords.
- The Tether app is an alternative setup path; distinguish the local login password from the Wi-Fi password.
Upgrade the firmware
Instructions from the manualUpdate matching router firmware5 steps
- Back up configuration first and keep power connected throughout the update.
- Use Advanced, System, Firmware Upgrade and Check for Upgrades, or download the appropriate Archer C6 V4 regional firmware from TP-Link and use Browse under Local Upgrade.
- Wait for the upgrade and reboot to complete.
- Never install firmware for a different hardware revision or region; consult the official V4 download page.
- Contact TP-Link if the upgrade fails.
Model details
Model and compatibility
- Hardware version
- This reference is for Archer C6 V4. TP-Link’s V4 listing supplies the shared Archer C6/Archer A6 REV4.0.1 guide. Match the hardware label and regional support page before installing firmware. [1]
- Wireless bands
- The front LEDs distinguish 2.4 GHz and 5 GHz bands. A disabled-band light is a configuration state rather than a numeric fault. [1]
- Power and ports
- Use the supplied power adapter. The WAN/Internet port connects to the modem or upstream Ethernet jack, and LAN ports connect wired devices. [1]