MODEL REFERENCE
TP-Link Archer C7 V5
17 errors · 13 troubleshooting topics · 5 guides
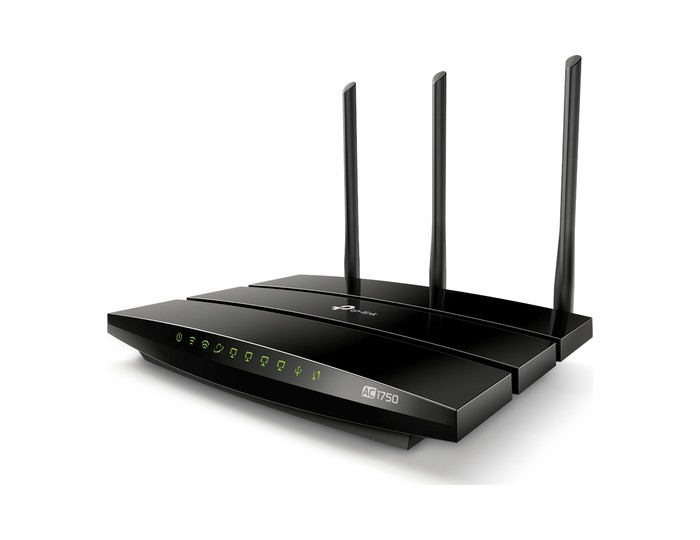
The checks and guides below come from the official manuals for this model.
No matches for this wording. Try a light name, error code or a shorter phrase.
Errors and indicators
Light patterns and messages documented in the manual Power solidrouter has finished starting
The router has started normally. No fault action is required.
Power flashingrouter is starting or updating firmware
Wait for startup or firmware installation to finish. Keep the power connected throughout an upgrade.
Power offrouter has no power
Connect the supplied adapter and switch the router on.
2.4 GHz on2.4 GHz Wi-Fi is enabled
This is the normal enabled state for the 2.4 GHz band.
2.4 GHz off2.4 GHz Wi-Fi is disabled
If you need this band, enable it under the router’s wireless settings or use its Wi-Fi button. This light is a configuration state rather than a numeric fault.
5 GHz on5 GHz Wi-Fi is enabled
This is the normal enabled state for the 5 GHz band.
5 GHz off5 GHz Wi-Fi is disabled
Enable the band in wireless settings if required. A 5 GHz-only device must be within its radio range.
Internet greeninternet service is available
The router has an internet connection. No fault action is required.
Internet orangewAN is connected without internet
Use the internet-access checks below. Check Advanced, Status, modem cabling and the ISP’s connection settings.
Internet offwAN port has no cable connection
Seat the Ethernet cable between Internet/WAN and the modem or upstream Ethernet socket.
Ethernet onpowered client is connected
A powered device is connected to the corresponding Ethernet port; this is a normal link state.
Ethernet offno powered Ethernet client is connected
If expecting a wired link, turn the client on and check its cable at both ends.
USB onuSB storage is ready
The inserted USB device is ready. Use the USB-storage guide for network sharing.
USB flashinguSB device is being identified
Wait while the router identifies the inserted USB device.
USB offno USB device is attached
Insert a supported USB storage device if network storage is needed.
WPS solid then offwPS connection completed
After a successful pairing, the light stays on for five minutes and then goes out. This timeout is normal.
WPS flashingwPS pairing is underway
Press the client’s WPS button after pressing the router’s WPS button. Allow up to two minutes for pairing.
Troubleshooting
Find the problem you are experiencingForgotten Wi-Fi passwordView
Check the router label for its original wireless password. If changed, connect by Ethernet, sign in at tplinkwifi.net and open Basic, Wireless to view or reset it.
Forgotten administrator password3 steps
- For TP-Link ID login or previously configured Password Recovery, choose Forgot password and follow the recovery prompts.
- Otherwise hold Reset until the Power LED flashes, then create a new login password.
- Factory reset erases the configuration and requires internet setup again.
Router management page will not open6 steps
- Connect to the router and check the link indicators.
- Let the computer obtain its IP and DNS automatically, then enter http://tplinkwifi.net or http://192.168.0.1 correctly.
- Try another browser or computer.
- The guide’s older Windows Internet Options workflow disables dial-up and LAN proxy options and restores advanced settings.
- Factory reset is the last documented step; save needed settings first and reconfigure afterward.
- Contact TP-Link if login still fails.
Extend a network with WDS bridging4 steps
- Configure WDS on the extending router.
- Give it an unused LAN address in the main router’s subnet, save and sign in again at the new address.
- Under Advanced, System Tools, System Parameters, enable WDS for the selected band, survey the main SSID, choose it and enter its wireless password.
- Save, disable DHCP on the extender and check Advanced, Status, Wireless shows WDS status Run.
No internet despite a valid WAN address5 steps
- Check Advanced, Status.
- If the WAN address is valid, the guide suggests setting Primary DNS to 8.8.8.8 under Advanced, Network, DHCP Server.
- Restart modem and router: leave both off one minute, start the modem, wait about two minutes for its link, then start the router and wait another one or two minutes.
- Check the affected computer’s TCP/IP settings if others work.
- Update matching firmware or reset and reconfigure as later steps, preserving settings first.
WAN address is 0.0.0.05 steps
- Check the physical modem-to-WAN cable.
- If the ISP registered a computer’s wired MAC address, configure the appropriate MAC Clone option under Advanced, Network, Internet.
- Avoid a LAN-address conflict with the modem by choosing a different subnet under Advanced, Network, LAN.
- Restart modem and router in the documented sequence, confirm the ISP’s connection type and parameters, then update matching firmware if needed.
- Contact TP-Link if internet remains unavailable.
Device cannot find any Wi-Fi networksView
Enable the device’s wireless adapter and confirm that its driver is installed. Consult the adapter or computer manufacturer if it still cannot detect a wireless network.
Router’s Wi-Fi name is missingView
Check the wireless LED, move the device within range and open Advanced, Wireless, Wireless Settings. Confirm the expected SSID is enabled and not hidden.
Wi-Fi password or PIN is rejectedView
The WPS PIN differs from the wireless password. Choose Connecting using a security key instead if PIN setup fails, and enter the current case-sensitive wireless password.
Device cannot join the wireless networkView
Move closer if the signal is weak. For 2.4 GHz interference, try channel 1, 6 or 11 in the router’s wireless settings. Reinstall or update the client’s wireless-adapter driver.
Back up or restore router settings3 steps
- Open Advanced, System Tools, Backup & Restore.
- Choose Backup to save the configuration .bin file.
- To restore it, choose the saved file and Restore, then wait for reboot without switching off or resetting the router.
Recover an interrupted firmware upgrade3 steps
- If a power interruption prevents startup, obtain the correct hardware-version firmware using another connection.
- Connect the computer to the router by Ethernet, open 192.168.0.1, select the firmware file and choose Upgrade.
- Keep power on and wait for installation and reboot.
Guides
Get to know about y our router
Instructions from the manualFactory-reset the router4 steps
- Back up needed settings first.
- Under Advanced, System Tools, Backup & Restore, Restore resets settings while retaining login credentials and TP-Link ID; Factory Restore performs the full factory reset.
- Wait through reboot without interrupting power.
- The hardware Reset button can also be held until the Power LED blinks.
Use WPS or toggle Wi-Fi3 steps
- Press WPS on the router, then immediately press the client’s WPS button.
- A solid WPS indicator confirms pairing.
- Holding the combined Wi-Fi button for about two seconds instead toggles the wireless function.
Manage the router
Instructions from the manualUpdate router firmware4 steps
- Back up the configuration and remove attached USB devices first.
- Under Advanced, System Tools, Firmware Upgrade, check for an online update or select a downloaded file that exactly matches the hardware version.
- Keep power on throughout installation and wait for reboot.
- Use the model’s regional V5 support listing when choosing a file.
Run network diagnostics3 steps
- Open Advanced, System Tools, Diagnostics.
- Choose Ping to test host reachability or Traceroute to follow the route, enter the IP address or domain and press Start.
- Leave the advanced packet settings at their defaults unless a specific test requires a change.
Set up a onemesh network
Instructions from the manualSet up and manage a OneMesh network4 steps
- Open Basic, OneMesh or Advanced, Wireless, OneMesh.
- If the page is missing, check for matching V5 firmware.
- Connect compatible OneMesh extenders using their own setup guides, then add available devices to the network.
- View clients under Basic, Network Map and manage or remove extenders from the OneMesh device page.
Model details
Model and compatibility
- Hardware version
- This reference is for Archer C7 V5, using the Rev5.2.0 guide supplied by its regional listing. Match hardware version and region before updating firmware. [1]
- Ports
- The router has a USB storage port, one Internet/WAN port and four Ethernet LAN ports. [1]
- Wireless bands
- The 2.4 GHz and 5 GHz radios have separate enabled and disabled indicators. [1]